Who said that to look stylish, you need to spend a lot? Check out 18 tips for making jewelry at home and rocking the look:
Jewelry never goes out of style and is the authentic “BBBs” piece: good, pretty and cheap. Is not it? But, if you don’t even have any money left for that beaded earring, how about learning how to make jewelry at home? And, above all, how about learning how to make them in a personalized way and without spending almost anything?
To do this, we have put together some very useful tips for you, if you want to start making your own jewelry. Who knows, maybe this activity will become a hobby or a new business?
Of course, models and creative ideas are very private issues, which combine creativity and personal taste. However, what we will cover in the selection are techniques that will help you work much more efficiently, without waste and without wasting time.
Other very interesting points that we will certainly address are how to make us safer. Furthermore, we will teach you how to finish each piece in a more professional and harmonious way and so on. Interesting, right? So check out all this below and learn more about this art.
Learn 18 tips for making jewelry at home:
1. How to store sequins and beads
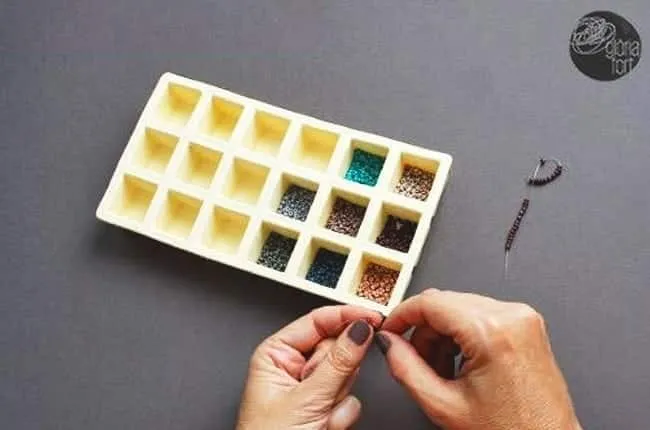
A great way to organize and store jewelry pieces, especially, is using ice cube trays. You can store sequins and beads in squares, separated by color, size, material, use and so on.
2. How to make hooks
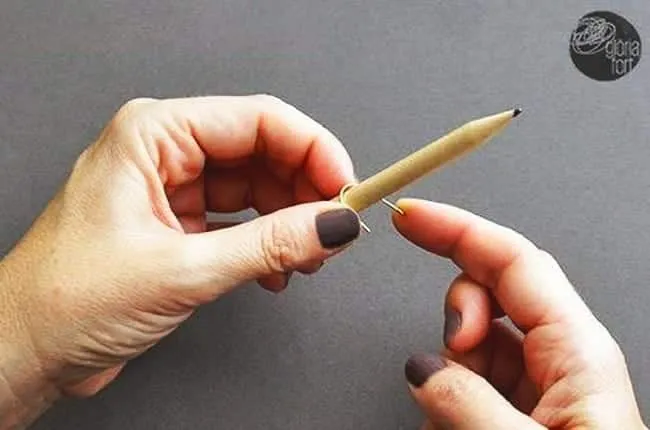
A pencil or pen can help you. This is because they make the task of bending wires and creating your own hooks easier. In fact, with this, you can create earrings or finish bracelets.
3. How to reinforce ends
When making jewelry at home using cords or threads, don’t just tie the piece with a messy knot at the end. In short, guarantee the safety of the piece with an earring clasp (donut), for example, or a larger bead.
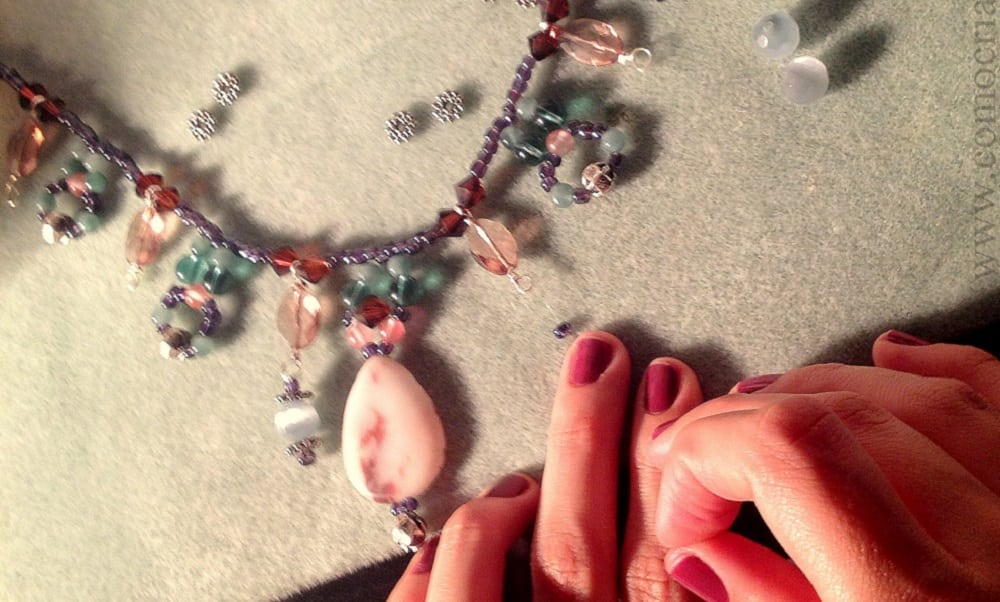
4. How to paste correctly
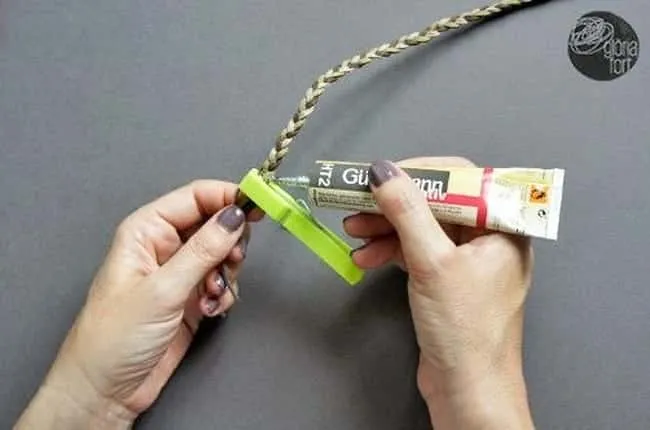
When finishing a homemade accessory and keeping all its stages together, as in the photo, use a clothespin. This will certainly keep everything in place until you apply the glue and it, in turn, dries.
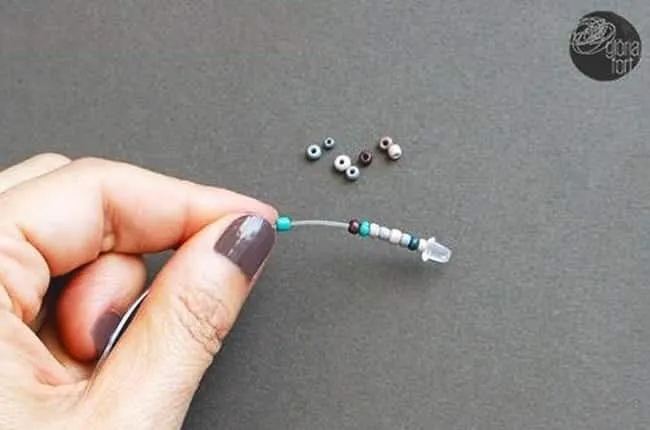
5. How to make swiping better
Making jewelry with beads is not difficult, but sliding piece by piece along the string can be tiring. To speed things up, apply clear nail polish to the cord and let it dry. This will make inserting the beads much easier.
6. How to create decorative tassels
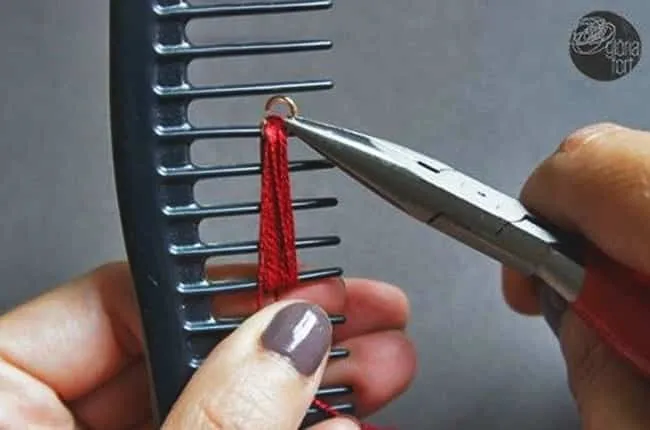
Use a wide-toothed comb to shape tassels in a practically professional manner. This way you will also be able to create your pieces with the length and density you prefer.
7. How to intertwine threads
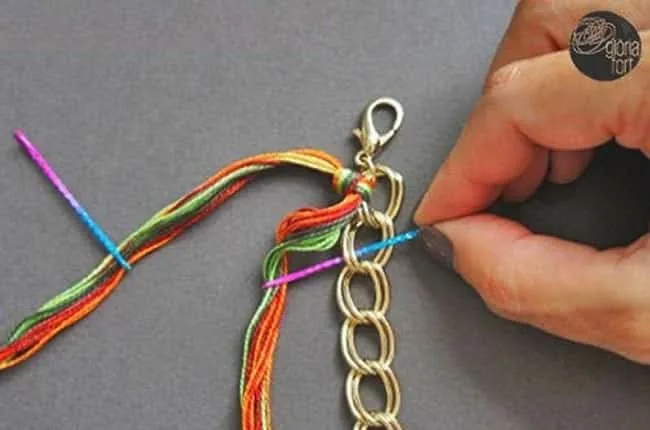
If you are creating a piece with threads intertwined with each other or between rings, for example, use hairpins to make the task simpler and more organized.
8. How to tie a knot correctly
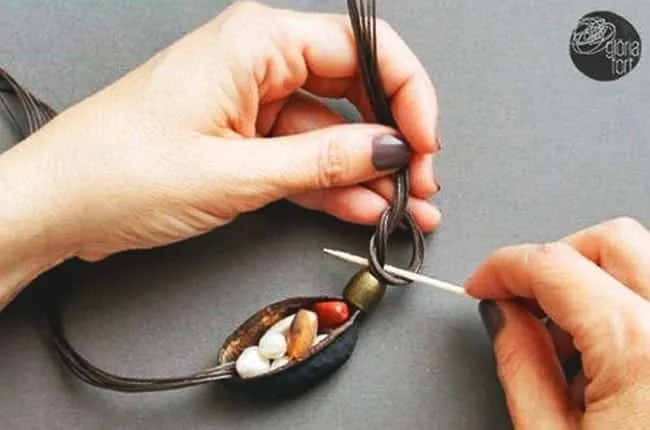
Insert a toothpick or thick needle into the center of what will be your knot and direct it however you feel necessary. This will help your finish to be safer and tighter, for example, and will also make it end closer to the beads or beads.
9. How to avoid marks on polymer clay

If you are making jewelry with this material, prevent the piece from getting fingerprints by using plastic wrap.
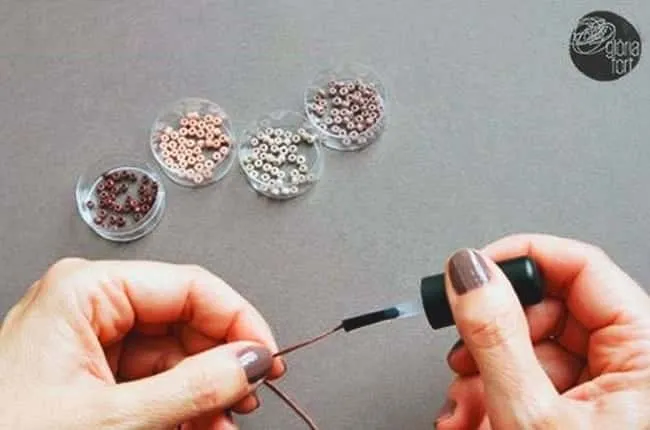
10. How to varnish jewelry
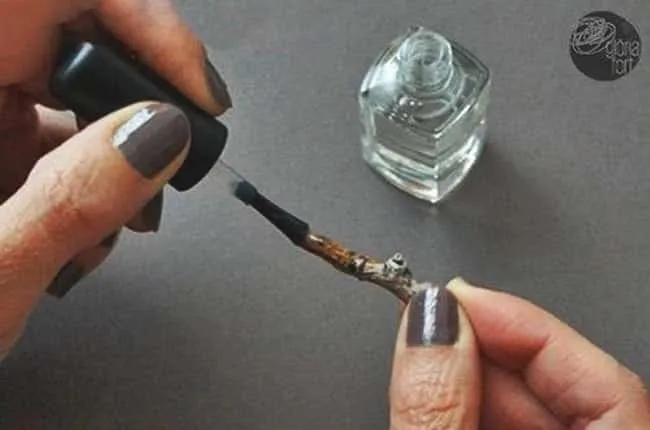
To finish your pieces and make them shine, varnish the jewelry you create with clear nail polish. This certainly increases the durability of the piece, as it creates a layer of protection over it.
11. How to make sure the knot doesn’t come undone

In the case of a bracelet, for example, finish the piece with a drop of cyanoacrylate glue or strong glue when tying the knot. This certainly prevents the knot from unraveling.
12. How to improvise a macramé stand
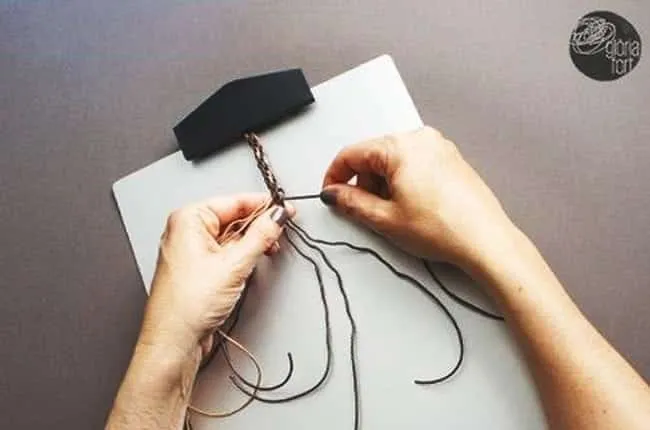
A clipboard or a board with a table clip, after all, can be the perfect supports for a macramé. To do this, simply secure the end of the piece and braid it however you want, without the risk of it coming loose.
13. How to create geometric patterns
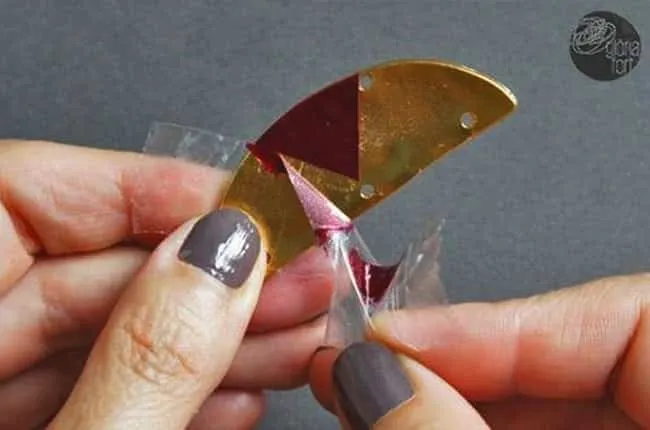
Nail polish and tape can help you create any print or geometric pattern on the metal pieces you want to customize.
14. How to thread needles
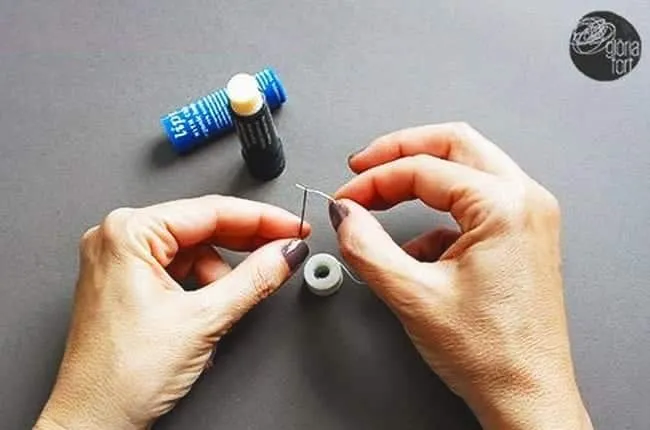
In short, everyone uses their mouth to “align” the thread that is going to be inserted into the needle, right? Before doing this, however, apply lip balm to your lips. This will make the thread or thread more waxy and the work will be simpler.
15. How to seal fitting ends
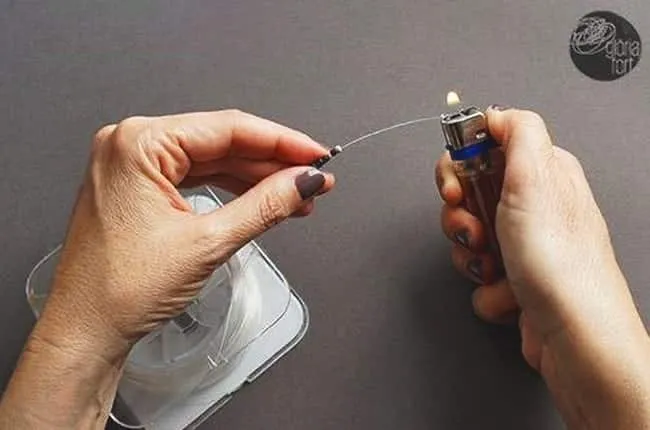
To stop the beads or beads from falling out one end while you are working on the piece, burn one side of the string with a lighter or match. However, if you don’t want that little black ball to form on the piece, burn the cord with a blue flame, which has the lowest temperature and will avoid the problem.
16. How to measure cord for parts
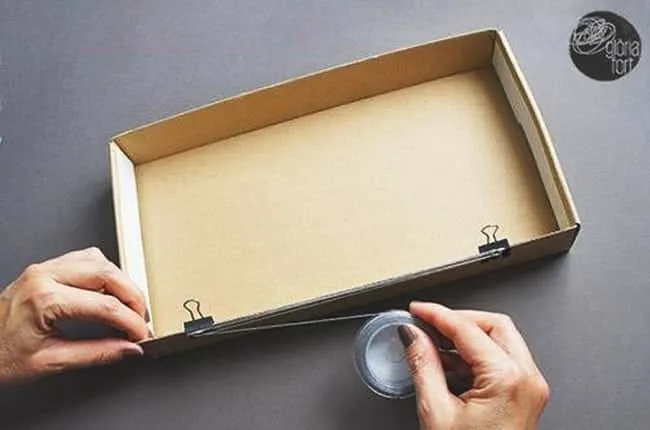
When measuring the cord needed to create the pieces, attach a paper clip to the ends of a box at the right distance. This will help you keep the thread taut, for example, and make the necessary turns more easily.
17. How to fix or shape leather cords
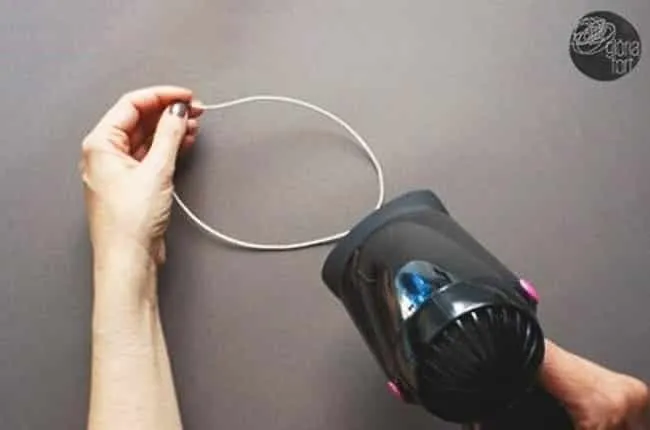
In short, just heat the cord with a hairdryer. Then, while still hot, you need to stretch it in the desired direction.
18. How to maintain order when working
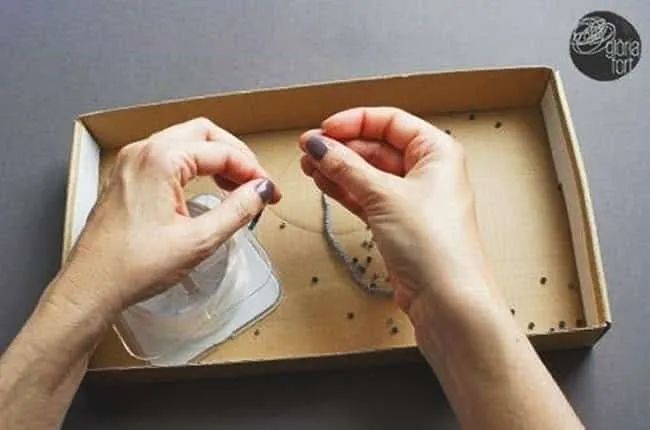
Making jewelry, however, can create a lot of mess if you are not a careful person. This is because the work requires handling tiny and varied parts. To keep everything in place, therefore, use a box underneath the piece you are working on. This will serve as a sideboard and will gather the pieces you will need to put to use.
And, speaking of accessories, you might also like to know: 23 Harry Potter-inspired jewelry that you’ll want to have.
Source: Incredible, Old Casa Sala