The traditional drumstick, but with a slightly different filling. Peru! But it could be chicken or another Christmas bird.
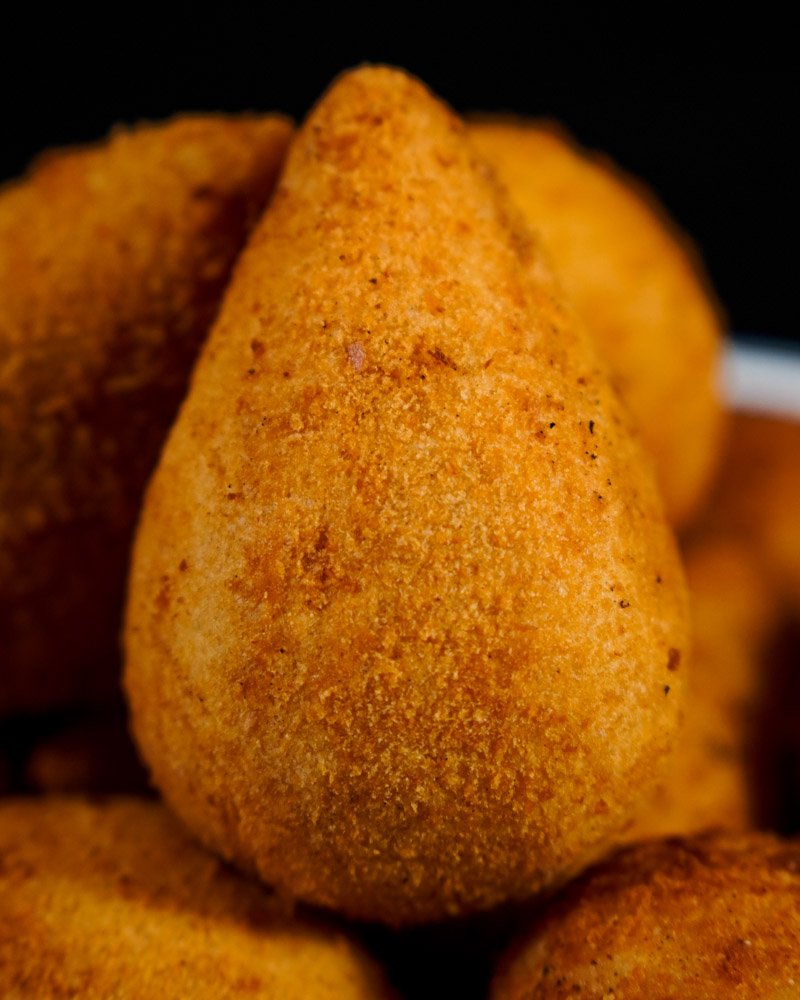
After seeing that turkey and other Christmas birds were on sale (the price had dropped a lot compared to the full price for Christmas and New Year), the idea came: how about a turkey drumstick?
Technically it is the same savory, traditional wheat flour dough, but with a different filling. Instead of being chicken, I put peru.
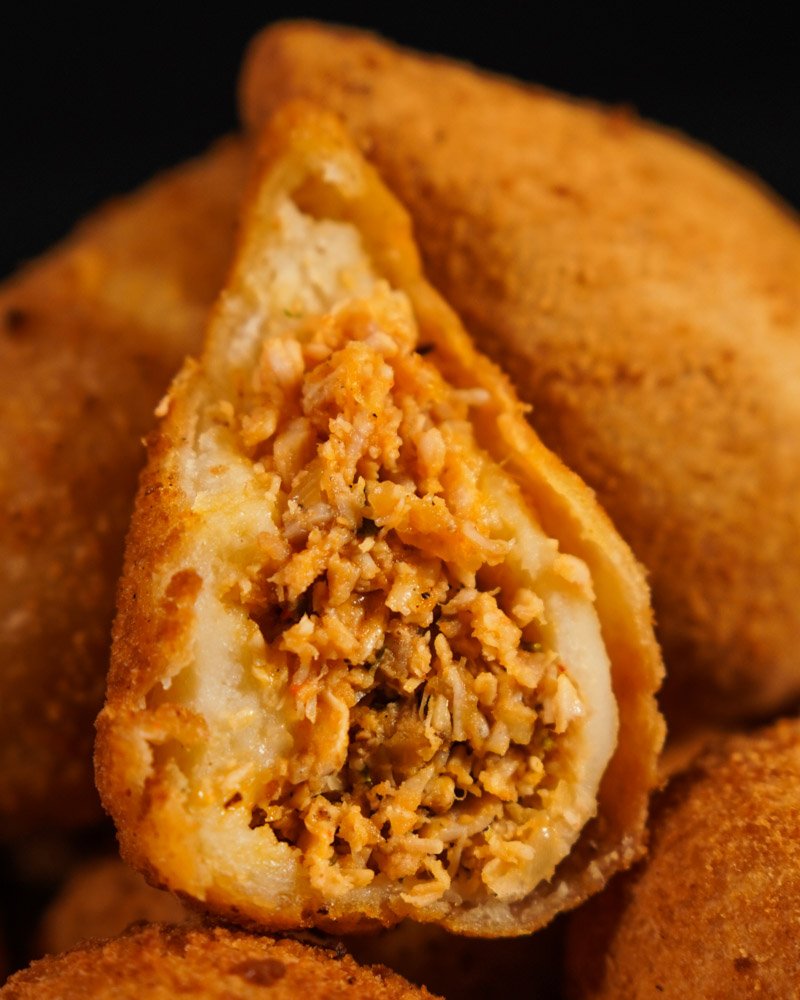
For the filling, the turkey meat was already cooked (in this case, roasted). It has several cuts from the chest to the thigh. I bought the whole turkey and I baked it (recipe coming soon) and as it makes a lot, I turned it into the filling for the coxinha.
Does it look like chicken? Yes and no. To me, turkey has a flavor a little more intense what chicken do you feel in the background. It is not as strong as game meat, duck or pheasant. Chicken is very mild, right? However, if it doesn’t say it’s turkey, I think it’s unlikely that anyone will recognize it.
Tips for an incredible coxinha
- The amount of filling for dough in the recipe is 2:1, that is, there is twice as much filling next to the dough. Yes, there will be leftover stuffing. To use all the filling you need to make two coxinha doughs, but I recommend making one at a time because of the quantity. It’s easier to do it separately.
- The meat of the filling is turkey, but it can be chicken or another Christmas bird such as chester, fiesta and so on.
- The seasoning for the coxinha/salted dough was unsalted vegetable stock cube, and it really is unsalted. It’s very smooth. If you want, you can make your own broth, but I didn’t want to and I didn’t have any. If you use a cube that already has salt, add it little by little so that it doesn’t get too salty.
- I tested roasting the drumsticks in the air fryer, but the result was less than expected… in addition to taking a long time. It took 35-40 minutes to get a golden color. However, my air fryer is an oven model and not a basket model, so this may have influenced it.
- The coxinha, after being shaped and breaded, can be frozen for up to 3 months, but I recommend a maximum of 2 months. Spread the drumsticks on a baking tray and place them in the freezer. When they are firm, transfer them to a plastic bag and remove as much air as possible. To fry, let it thaw completely.
Turkey drumstick
Makes: 15 medium units
Turkey stuffing
- 15 g vegetable oil (can be olive oil)
- 1 onion (medium, grated)
- 3 teeth garlic (grated)
- 400 g cooked turkey (shredded, can be chicken)
- ½ teaspoon colorific
- 40 g tomato extract
- ½ teaspoon dried parsley (or fresh)
- 100 mL water
- refined salt (August)
- ground black pepper (August)
Salty dough
- 300 g water
- 300 g skimmed milk
- 40 g butter without salt (may be cold)
- 1 cube vegetable broth (without salt, see note)
- refined salt (August)
- 300 g wheat flour
Breaded
- 400 g water
- 30 g maize starch
- 150 g breadcrumbs
- 150 g panko flour
- 900 mL vegetable oil (to fry)
1 cup: 250mL | 1 tablespoon: 15mL.
Turkey stuffing
- Heat oil in a frying pan and sauté onion and garlic until translucent and aromatic, about 2-3 minutes.
- Add the cooked and shredded turkey, mix lightly, cook for 1-2 minutes.
- Add colorific, tomato paste, parsley, water and mix well. Cook for 3-4 minutes or until the amount of water reduces.
- Season with salt and black pepper, mix.
- Remove from heat and let it stay at least warm before using.
Salty dough
- Heat water, milk, butter, bouillon cube in a pan until boiling, about 3-4 minutes. Stir to dissolve the cube.
- Add flour all at once and mix very well to form a uniform dough, about 2-3 minutes. If you use a non-stick pan, a film will form on the bottom of the pan, which is an indication that it is good.
- Transfer the dough to a clean, oiled surface. If you use a non-stick silicone mat, you don’t need to grease it. Let it cool for about 3-4 minutes.
Coxinha modeling
- Knead the dough when you can handle it without burning yourself, the dough should be uniform and smoother.
- Separate portions of about 45-50g of dough, make a ball. Then, flatten it with the palm of your hands to form a disc of uniform thickness.
- Place the turkey stuffing in the center of the disc, don’t add too much otherwise it won’t close and it could burst when frying.
- Join the edges of the disc to the center, pressing to close; it may be necessary to remove excess dough.
- Shape it with the inside of your palms to give it the traditional thigh shape (in the video it will be easier to understand this part).
- Another way: After kneading the dough, roll it out into a rectangle of uniform thickness and cut into squares to separate the dough portions. This makes it easier to know their size.
Breaded
- Mix water and cornstarch in a bowl, stir well.
- Dip each drumstick in the water and starch mixture.
- Cover with breadcrumbs or panko flour. The breadcrumbs give it the traditional coxinha look, and the panko gives it more texture.
- Fry the drumsticks in hot oil at 180ºC, doing it little by little. It should be golden brown in 3-4 minutes.
- Remove from the oil and let drain on paper towel.
- Serve it hot.
- Amount: the ratio of filling to dough is 2:1, that is, there is twice as much filling for the amount of dough. If you want, you can reduce the filling by half. If you are going to use it all to make coxinhas, I recommend that you make the amount of dough one at a time to have more control over the cooking of the dough.
- Peru: can be exchanged for chicken or another Christmas bird like chester.
- Water: the pasta can be replaced with broth made from chicken or vegetables, as I didn’t have either, I used water with the vegetable stock cube.
- Vegetable cube: I used a salt-free version in the composition and it really isn’t salty. I tested it with half a cube and it was super smooth, so that’s why I use the whole cube in the dough (and it was smooth too). If using unsalted cube, season the dough well with the added salt. If you use a cube of salt, add it little by little, as it tends to be salty.
Portion: 100g | Calories: 212kcal (11%) | Carbohydrates: 24g (8%) | Protein: 13g (27%) | Fat: 7g (10%) | Saturated fat: 3g (17%) | Polyunsaturated Fat: 1g | Monosaturated Fat: 3g | Trans fat: 1g | Cholesterol: 33mg (11%) | Sodium: 297mg (13%) | Potassium: 228mg (7%) | Fiber: 1g (6%) | Sugar: 4g (4%) | Vitamin A: 207IU (4%) | Vitamin B2: 1mg (78%) | Vitamin C: 1mg (2%) | Calcium: 93mg (9%) | Ferro: 1mg (7%)

Sign up for our newsletter and stay up to date with exclusive news
that can transform your routine!
Warning: Undefined array key "title" in /home/storelat/public_html/wp-content/plugins/link-whisper-premium/templates/frontend/related-posts.php on line 12
Warning: Undefined array key "title_tag" in /home/storelat/public_html/wp-content/plugins/link-whisper-premium/templates/frontend/related-posts.php on line 13