This is the result of extended holiday + I want to play with royal icing. It’s okay that the idea of cookies in this format is older, but when involving icing you need time with a certain amount of slack.
Don’t look at me like that, you know. Combining food and science with hints of nerdism is part of my being. Just like Ms. Humble, I am the convergence of:

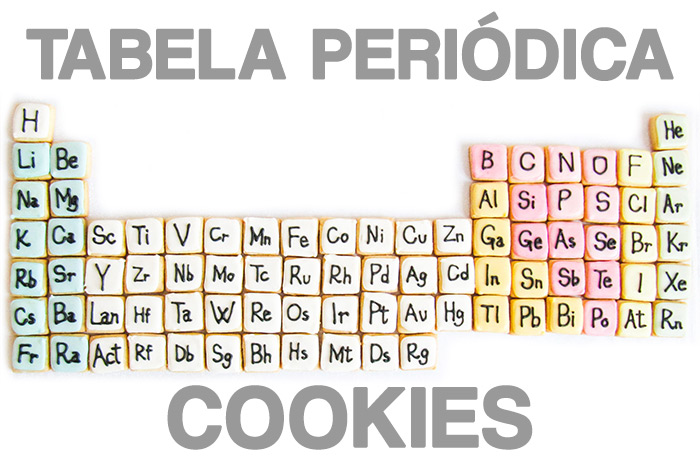
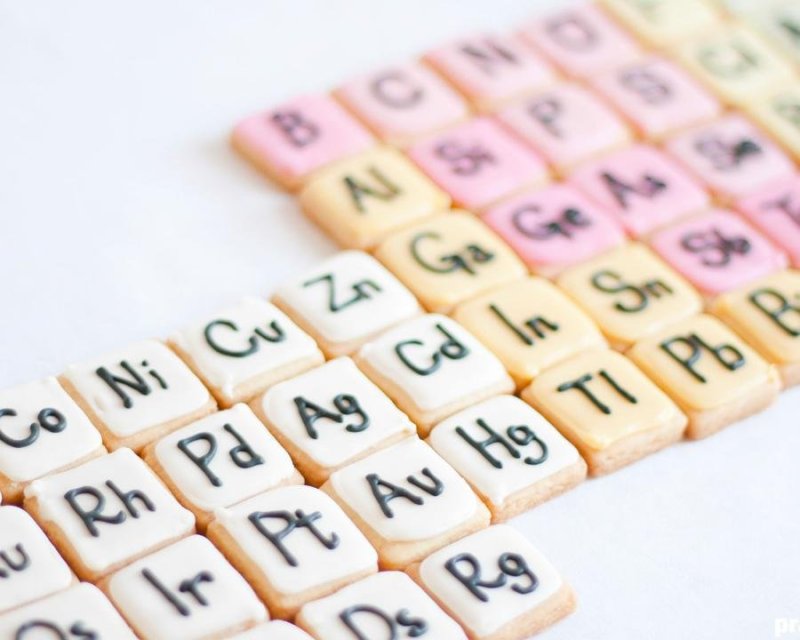
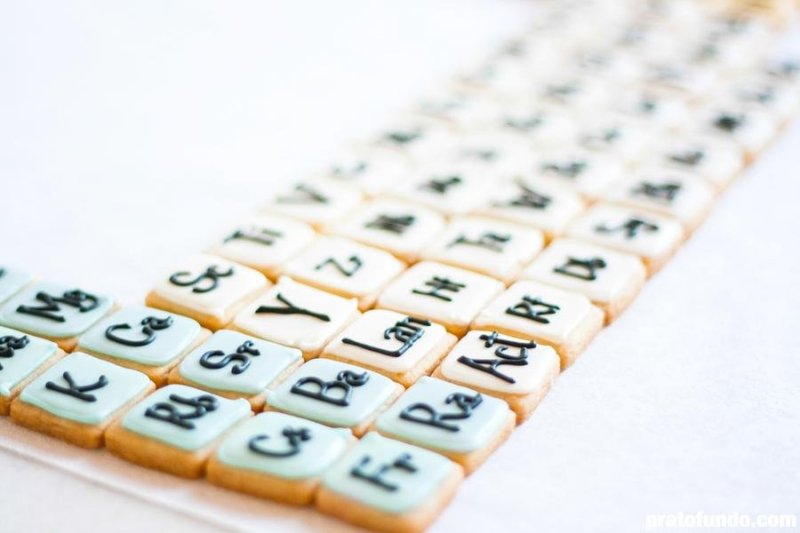
In this edible version of the table I represented: Alkalies (Light Blue); Alkaline Earths (dark blue); Mexternal transition etals e Hydrogen (branco); Representative metals (orange); In semesters (pink); Non-metals (Rosa); Halogens (yellow); Named gases (green). The elements of the series Lanthanids e Actinidia were not represented, except for Amerício (actinidia). And the “element” Rd it doesn’t really exist. I did it to form the word nerd, heheheh.
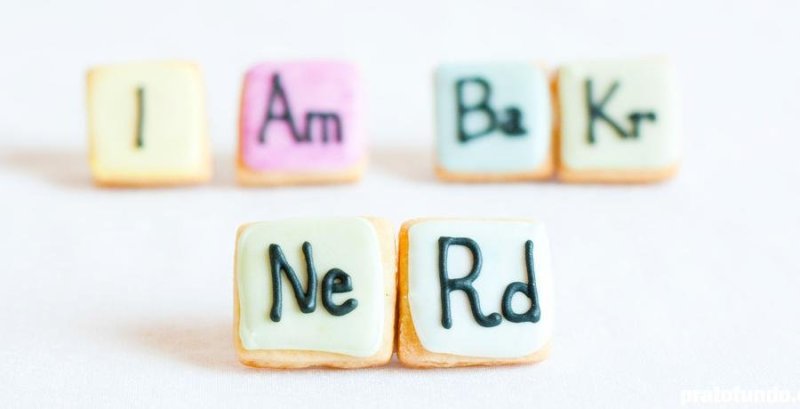
I used the information available on the IUPAC (International Union of Pure and Applied Chemistry) sobre a tabela: Periodic Table of the Elements. I: iodine; Am: americium; Ba: barium; Kr: krypton; Ne: neon; Rd: does not exist
For the project I used:
- Basic Butter Cookies (about recipe below)
- 2x2cm square cutter
- Royal icing
- Various gel dyes (blue indigo, leaf green, pink, yolk/apricot yellow, cherry pink, plum black)
In total, 100 2x2cm cookies were baked, of which there were 85 to form the table. And a recipe for royal icing (see the end of the article) and there were still around 2 full tablespoons left, so I decorated the surplus as well.
Among the many reasons that led me to make cookies, the main one is undoubtedly: I want to learn how to actually work with royal icing. As you can see, the piping It wasn’t perfect, but it improved a lot.
Some tips from those It’s starting for whom will start:
- Having cookie dough living in the freezer is vital to speeding up the process.
- Make extra cookies so you can make mistakes at the beginning and improve at the end. Tip valid especially when you have an order, sh*t happens and you know this.
- Did you make a mistake? Was the contour crooked? Take it out and do it again.
- Toothpicks are your friend, try to buy several boxes.
- Patience is a virtue… that you learn to have when working with royal icing. Wait for it to dry before you can continue. If you’re in a hurry, don’t do it. It will go wrong and you will curse a lot.
- If you’re not aware that you have two hands with several fingers and a neck, you’ll find out. Fingers: you use them for everything, cleaning up icing that has run here and there. Neck: hurts after hours of decorating.
- It could just be printing, but I found it harder to work with white icing than colored icing. Even though I did them at the beginning (without practice) and at the end (with some skill).
- Dyeing icing black… sir, that was so much dye! Detail that it was gel and even so, pulpy pieces of it were used to color about 2 spoons (dessert). I was worried that it would stain the piping bag (white), so I used a disposable one.
Before starting the training, I read a lot of foreign blogs that deal with the subject. For better planning and adapting to the project you want to do. I highly recommend: Bake at 350, University of Cookie, Thinkin’ Outside The Cookie!, Sweetopia.
Speaking of which, the base cookie recipe is Yellow Rose Sugar Cookies (Bake at 350) which Paula Cookie (The Cookie Shop) translated, see: Guest Bridget, from Bake at 350° – Cookies decorated with royal icing (part 1, the icing).
Perhaps the only step different it would be the frosting ingredients. Instead of meringue powder, I use powdered egg white. The process is very similar and I didn’t notice a difference in the result, but I don’t have that much experience to be conclusive. The method I used is after the cut at the end of the article.
My eternal thanks to Miss Bridget from Bake at 350 for sharing with us tips on decorated cookies and the like! (Miss B., if you read this, thanks once more! Your tips and trick help me a lot!).

Science never taste sooo good! (I always wanted to say that,)
Science has never been so tasty!
Cookie Dough and Royal Icing
Makes: 20 medium sized cookies
Cookie Dough (Sugar Cookie)
- 226 g butter without salt (chilled; can be with or without salt)
- 200 g refined sugar
- 1 ovo
- 420 g wheat flour
- 5 g vanilla essence (transparent)
Royal icing (ready mix)
- 500g g royal icing mix (see note)
- 80 g water
Royal icing with egg whites
- 2 soup spoons clear powder
- 6 soup spoons water (warm)
- 400g g impalpable icing sugar (sifted)
- Vanilla essence (transparent; almond essence; optional)
- Gel food coloring
1 cup: 250mL | 1 tablespoon: 15mL.
Cookie Dough (Sugar Cookie)
- Heat the oven to 180ºC if you are going to bake straight away.
- Beat the butter and sugar until very creamy, about 5 minutes.
- Add the egg, vanilla and mix well to combine.
- Add the flour and mix well.
- The dough will be crumbly, bring it together with your hands. It can be placed in the refrigerator if it is too hot.
- Roll out the dough to a thickness of between 3-4mm and place in the freezer to firm up.
- Cut into the desired shape and place in the freezer for 5 minutes.
- Bake for about 10-12 minutes, it should be slightly golden around the edges. Very lightly.
Royal icing (ready mix)
- Combine the royal icing mixture with water in a bowl.
- Beat on low speed for 1 minute, then increase the speed to medium-high for 9 minutes.
- This is the currently recommended option.
Royal icing with egg whites
- Process around 100g of egg whites into powder, sieve. From this processed egg white, remove the required amount: 2 tablespoons.
- Add the powdered egg whites with warm water, mix well. Beat the mixer to break up the lumps of egg white powder, it does not dissolve easily. Leave to rest for 1-2 hours covered with plastic wrap.
- This process can be done the night before using the icing, wait for the water to cool, cover and place in the refrigerator. The next day, just let it come to room temperature and that’s it.
- In the mixer with the paddle attachment, place the reconstituted egg white. Beat at the lowest speed, add the powdered sugar little by little. Increase the speed to medium and add essence, if desired. The amount of sugar may vary.
- The point is a firm peak when the whisk is turned upside down, a peak is formed that does not fall on itself, but is still malleable. It shouldn’t be hard.
- Once ready, cover the bowl with plastic wrap to prevent it from drying out. This icing point is to be used for outlines, writing and firmer details. To fill, simply dissolve the icing with water little by little until it acquires a fluid consistency.
- Culinary margarine: butter can be exchanged for same amount for culinary margarine. It’s not the margarine used to spread bread, it has to be the specific one for cooking.
- Vegetable fat: butter can be exchanged for 190g vegetable fat com 30g water. Add the water along with the egg. And if you use fat, the cookie has a much milder flavor, so I suggest adding more vanilla essence, about 8-10 g.
Portion: 100g | Calories: 376kcal (19%) | Carbohydrates: 71g (24%) | Protein: 3g (6%) | Fat: 10g (15%) | Saturated fat: 6g (38%) | Polyunsaturated Fat: 1g | Monosaturated Fat: 2g | Trans fat: 0g | Cholesterol: 32mg (11%) | Sodium: 11mg | Potassium: 34mg (1%) | Fiber: 1g (4%) | Sugar: 54g (60%) | Vitamin A: 294IU (6%) | Vitamin B2: 0mg (6%) | Calcium: 8mg (1%) | Ferro: 1mg (6%)

Sign up for our newsletter and stay up to date with exclusive news
that can transform your routine!
Warning: Undefined array key "title" in /home/storelat/public_html/wp-content/plugins/link-whisper-premium/templates/frontend/related-posts.php on line 12
Warning: Undefined array key "title_tag" in /home/storelat/public_html/wp-content/plugins/link-whisper-premium/templates/frontend/related-posts.php on line 13