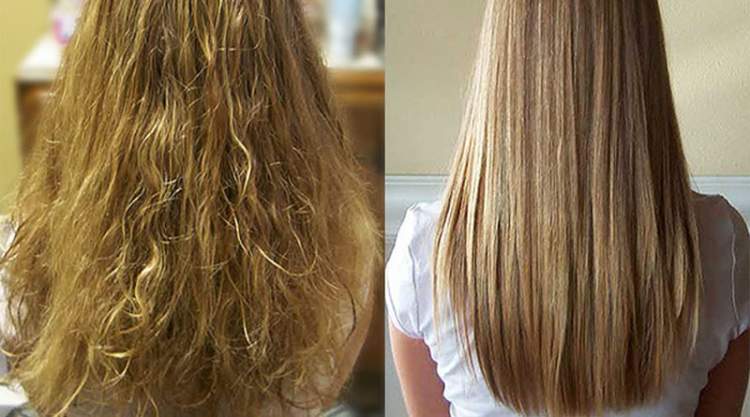
Many women want to have more control over the volume of their locks, but not all want to do a conventional straightening. Did you identify yourself? So get to know the brush recipe homemade progressive with aspirin which will help keep your hair volume under control.
Below we list the step-by-step instructions on how to carry out this procedure at home and have the hair of your dreams.
It’s simpler than it seems! One of the most common medications for those suffering from headaches can be very interesting for your hair.
The secret is in the presence of acetyl salicylic acid, which is widely used in the cosmetics industry, especially for skin care.
How to progress with aspirin – Step by step
This is a very simple homemade recipe, to make it more efficient we will divide the procedures into phase 1 and phase 2.
See Also: Natural straightening with cornstarch, milk and sugar
And more: Natural straightening with coconut milk and lemon
Phase 1 of homemade progressive brushing with aspirin
Required ingredients
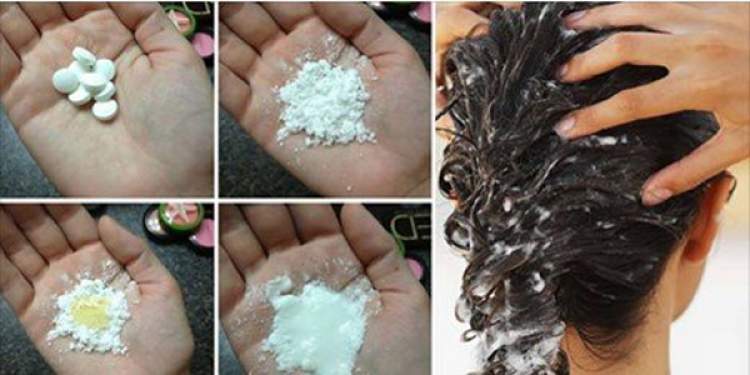
4 aspirin
1 tablespoon of powdered milk.
1 cap measure of liquid Bepantol – the cap is that of the product itself.
2 spoons of hair hydration cream from the brand of your choice.
2 tablespoons of cream. For those who are going to use canned cream, it is necessary to remove the whey.
100 ml of whole milk, cannot be replaced with skimmed milk.
How to carry out phase 1 of home progressive therapy with aspirin
Step 1 – The 4 aspirins must be dissolved in whole milk, it is important that they completely dissolve.
Step 2 – Add the mixture of aspirin and milk to the moisturizing cream, powdered milk, Bepantol and cream. Stir very well so that it becomes a homogeneous substance. The mixture is ready in the next step to apply the substance to the locks.
Step 3 – Before application, you must wash your locks twice with your usual shampoo so that the hair scales are open to the formula.
Step 4 – Using a towel, remove excess moisture from your hair.
Step 5 – In this step you must apply the mixture of homemade progressive powder with aspirin. The most assertive way to apply this is to previously divide your hair into strands and apply the mixture strand by strand. Continue massaging your hair to help the formula do its job.
Step 6 – To enhance the effect of this homemade formula, you should put on a plastic or laminated cap and wait about 30 minutes.
Step 7 – You must then rinse your locks well, completely removing the product from your hair. After finishing removing the product, dry your locks with a towel.
See Also: Homemade straightening with powdered milk and honey
And more: Learn how to straighten your hair with cornstarch and milk – Homemade recipe
Phase 2 of homemade progressive brushing with aspirin

Required ingredients
Thermal protector (product used to prevent heat from harming the health of the locks)
Cuticle sealing product
Curling iron
Dryer
How to carry out phase 2 of home progressive therapy with aspirin
Step 1 – While your locks are still damp, you must apply the cuticle sealer, which will act on the hair for 15 minutes.
Step 2 – Next, you must wash your hair again to completely remove the product. Dry the locks with the help of a towel.
Step 3 – Apply a moderate amount of thermal protector to your hair.
Step 4 – Using a brush and a dryer, brush the locks. You should leave your hair very straight, so use this brush.
Step 5 – ONLY when your hair is completely dry, use the straightener three times on each strand of hair so that the progressive agents penetrate the strands.
Important
After carrying out the procedure, you must not wash your hair for 3 days. Homemade progressive with aspirin is not recommended for pregnant women, nursing mothers and children under 10 years of age.
See Also: 7 tips on how to make progressive last longer
And more: Moroccan progressive brush

Sign up for our newsletter and stay up to date with exclusive news
that can transform your routine!
Warning: Undefined array key "title" in /home/storelat/public_html/wp-content/plugins/link-whisper-premium/templates/frontend/related-posts.php on line 12
Warning: Undefined array key "title_tag" in /home/storelat/public_html/wp-content/plugins/link-whisper-premium/templates/frontend/related-posts.php on line 13