Nail decoration does not follow a standard, so women’s creativity runs wild and everyone can have their own nail art as they wish. And, as if that weren’t enough, a nail style can be done in different ways and with different materials.
And for those of you who enjoy decorated nails, let’s learn another zigzag nail art tutorial.
See too: Learn how to do decorated nails step by step
1. Zigzag nail art

To decorate your zigzag nails, have on hand: base, white, blue and brown nail polishes (or use other colors you wish). Special zigzag cutting scissors (sold at any stationery store, they’re cheap) and tape.
1. First of all, take a piece of durex and paint the durex with the colors blue and brown (one next to the other) or in whatever color you want. Wait for it to dry well, as you will then cut out small zigzags.
2. Apply base coat to all your nails and then polish them white, in as many layers as you wish, and wait for it to dry.
3. After the nail polish on the Durex has dried, using special scissors, cut out small pieces of the Durex in the size you want and stick them on your nails.
4. Finish with an extra shine base.
See too: Nails decorated for graduation party
See the step by step in the video below
2. Zigzag nail art with a toothpick
If you want to do less work, you can zigzag the nail with a toothpick. It looks more relaxed, but not as perfect as with the scissors technique. See an example below.
See too: Nails decorated with ethnic prints

Have on hand: In this nail, the colors orange, blue and a toothpick were used.
1. Polish your nails in two colors. One part in blue and the other part in orange.
2. While the nail polish is still wet, take the toothpick and make zigzag shapes on the nail, as desired.
3. Done! Finish with foundation or extra shine.
See too: Winter 2014 nail trends
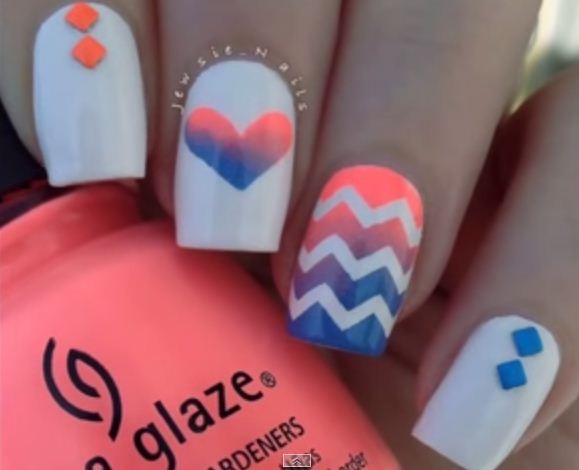
3.Gradient zigzag nail art

Have on hand: base, white, blue and pink nail polishes. A sponge to do the gradient, special zigzag cutting scissors and tape.
1. First of all, prepare the shapes to apply to the nail, enameling a piece of durex in the color you want, as it will then be removed from the nail.
2. Polish your nails white and wait for it to dry.
3. Cut out little zigzag pieces in the durex with special scissors and stick them on your nails.
4. Take a small piece of sponge and make two stripes, one in blue and the other in pink.
5. Apply the sponge to the nail, pressing lightly, tapping gently so that the gradient comes off the nail.
6. Once done, remove the zigzag cuts and finish with the base. Ready.
See too: Nails decorated with rhinestones step by step
To make the heart
7. Take a small piece of tape that covers the nail and fold it in half. In the corner of the folded part, cut out in the shape of a “half heart”. Open the durex and stick it on the nail, there will be a heart in the middle of the nail. Apply the blue and pink colors to the sponge and apply to the nail. Once done, remove the sticker. That’s it, the gradient heart is done! Finish with foundation.
See too: Heart nail art step by step
Follow the step by step in the video below

Click here and get immediate access to the Nail Designer Course
EXCLUSIVE Course – IN 17 VIDEOS, for you to become an excellent NAIL DESIGNER and keep up with Decorated Nails trends.
You will learn the steps to become a Nail Designer, from the basic principles of manicure such as Cuticle, Enamel and Frenchie, through Porcelain and False Stretching techniques, and finally arriving at the long-awaited Nail Arts, or, various Decorated Nails, where 7 themes and more than 15 models of decorated nails will be shown.
This Course is 100% ONLINE, in VIDEO and through a MEMBER PORTAL. With this you have:
* 17 Videos with incredible techniques;
* 3 hours and 40 minutes of classes;
* Images in High Definition (HD);
* Simple and practical teaching;
* 6-month access to the VIP Portal;
* Possibility to download all 17 video classes;
* Access to a closed and exclusive group for Students on Facebook.
Click here and get immediate access to the Nail Designer Course
Images: Reproduction/Internet

Sign up for our newsletter and stay up to date with exclusive news
that can transform your routine!
Warning: Undefined array key "title" in /home/storelat/public_html/wp-content/plugins/link-whisper-premium/templates/frontend/related-posts.php on line 12
Warning: Undefined array key "title_tag" in /home/storelat/public_html/wp-content/plugins/link-whisper-premium/templates/frontend/related-posts.php on line 13