
As a mobile home owner, I understand the unique challenges we face when it comes to maintaining our living spaces. One of the most daunting tasks is repairing the ceiling. Over time, ceilings can become damaged due to leaks, wear and tear, or even poor installation. But don’t fret! In this guide, I’m going to share expert tips and DIY guides to help you transform your mobile home ceiling into a beautiful and functional part of your space. Let’s dive in!
Understanding the Importance of Ceiling Repair
Repairing your ceiling is not just about aesthetics; it plays a crucial role in the overall health of your mobile home. Here are a few reasons why you should prioritize ceiling repair:
- Structural Integrity: A damaged ceiling can compromise the structural integrity of your mobile home. Water damage, for instance, can lead to mold growth and other severe issues.
- Energy Efficiency: Poorly insulated ceilings can lead to increased energy bills. By repairing and insulating your ceiling properly, you can save money in the long run.
- Aesthetic Appeal: A beautiful ceiling can enhance the overall look of your home. It’s an opportunity to express your style and make your space more inviting.
Identifying Common Ceiling Issues
Before diving into repairs, it’s essential to identify the specific issues affecting your ceiling. Here are some common problems you might encounter:
- Water Damage: Stains, sagging, or peeling paint are signs of water damage that need immediate attention.
- Cracks and Holes: Cracks can occur due to settling or temperature changes, while holes may result from nails or screws coming loose.
- Popcorn Ceilings: Often found in older mobile homes, popcorn ceilings can be dated and difficult to clean.
Step-by-Step Guide to Repairing Your Mobile Home Ceiling
Now that we’ve identified the issues, let’s explore how to repair them effectively. Here’s a step-by-step guide that I found helpful:
1. Gather Your Tools and Materials
Before starting any repairs, gather the necessary tools and materials. Here’s what you’ll need:
- Drop cloths
- Safety goggles and gloves
- Putty knife
- Drywall compound
- Paint and primer
- Patch kit (for holes and cracks)
- Ceiling texture spray (if applicable)
2. Prepare the Area
To protect your furniture and flooring, cover everything with drop cloths. Ensure proper ventilation in the area by opening windows or using a fan.
3. Assess and Repair Water Damage
If you notice water stains or sagging, it’s crucial to address the source of the leak first. Once repaired, follow these steps:
- Remove any damaged drywall or ceiling material.
- Allow the area to dry completely.
- Apply a mold-killing primer before installing new drywall or patching.
4. Fix Cracks and Holes
For cracks and holes, use the putty knife to apply drywall compound. Here’s how:
- Clean the area around the crack or hole.
- Apply the compound using the putty knife, smoothing it out to blend with the surrounding ceiling.
- Allow it to dry completely, then sand it down for a smooth finish.
5. Consider Texture Options
If you have a popcorn ceiling and want to modernize it, consider scraping it off or covering it with new drywall. If you prefer to keep the texture, simply repaint it after repairs.
6. Painting and Finishing Touches
Once all repairs are complete, it’s time to paint. Here are some tips:
- Use a primer to seal any repaired areas.
- Select a high-quality ceiling paint for a clean finish.
- Consider using a roller for even application.
DIY vs. Hiring a Professional: What Should You Choose?
This is a common dilemma among mobile home owners. While I believe in the power of DIY, there are times when hiring a professional is the best option. Here are some factors to consider:
- Complexity of the Job: If the damage is severe or involves electrical or plumbing work, it’s wise to hire a professional.
- Your Skill Level: If you’re a novice, starting with smaller repairs might be best to build your confidence.
- Time Constraints: If you’re short on time, hiring someone might be the more efficient choice.
Cost Considerations
Understanding the costs involved in ceiling repair is crucial for budgeting. On average, here’s what you can expect:
- DIY repairs: $50 – $200 depending on materials needed.
- Hiring a professional: $300 – $1,000 based on the extent of the damage.
Remember, investing in repairs now can save you money in the long run by avoiding larger issues down the road.
Case Studies: Successful Ceiling Transformations
To inspire you further, here are a couple of case studies of successful ceiling transformations:
Case Study 1: From Water Damaged to Stunning
A friend of mine faced severe water damage due to a roof leak. After fixing the source of the leak, she replaced the damaged drywall and painted the ceiling a light color, making her small space feel larger and more inviting. The transformation was remarkable!
Case Study 2: Updating a Popcorn Ceiling
Another acquaintance decided to remove the outdated popcorn texture from her ceiling. After scraping and sanding, she painted it with a modern flat finish. The update not only enhanced the aesthetic but also increased the home’s value.
Maintenance Tips for a Long-Lasting Ceiling
Once you’ve repaired your ceiling, maintaining it is essential. Here are some tips to keep it looking great:
- Regularly inspect for signs of water damage or cracks.
- Keep the area well-ventilated to prevent mold growth.
- Schedule annual maintenance checks to address any potential issues early.
Frequently Asked Questions
1. How long does it take to repair a mobile home ceiling?
The time required depends on the severity of the damage. Minor repairs can take a few hours, while extensive work may require several days.
2. Can I paint my ceiling after repair?
Yes! Painting is one of the best ways to finish off your repair. Just ensure that the repaired areas are fully dry and primed.
3. Should I hire a professional for ceiling repairs?
If you’re unsure about your skills or the complexity of the repair, hiring a professional can save you time and ensure quality work.
Conclusion
Repairing your mobile home ceiling doesn’t have to be a daunting task. By understanding the common issues, utilizing the right techniques, and maintaining your ceiling, you can transform this essential part of your home. Whether you choose to tackle the repairs yourself or hire a professional, the results will significantly enhance your living space.
If you found this guide helpful, please consider signing up for our newsletter for more tips and tricks! Don’t forget to share this article with friends and on social media to help others transform their mobile homes too!
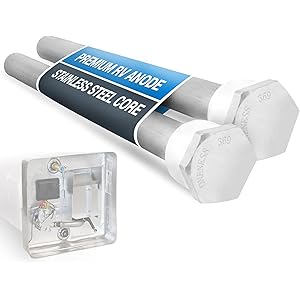
RV Water Heater Anode Rod - 2-Pack, 2 Years Warranty - 9.25" x 3/4" NPT - Premium Magnesium Anode Rod for hot water heater Rv, Long-Lasting Protection Suburban Anode Rod for Rv Water Heater
$17.49 (as of November 13, 2025 07:53 GMT -03:00 - More infoProduct prices and availability are accurate as of the date/time indicated and are subject to change. Any price and availability information displayed on [relevant Amazon Site(s), as applicable] at the time of purchase will apply to the purchase of this product.)
Sign up for our newsletter and stay up to date with exclusive news
that can transform your routine!


