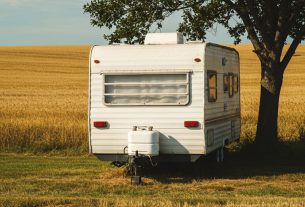
When I first purchased my trailer, it was a rusty relic of its former self, barely functional and certainly not something I would proudly haul my belongings in. However, I saw potential. I envisioned a trailer that would not only serve my needs but also reflect my personality and craftsmanship. Thus began my journey of restoring a trailer, and I’m here to share my insights, tips, and experiences with you. If you’re ready to restore your trailer, you’re in the right place. Let’s transform that hauler together!
The Allure of Restoration
Restoring a trailer is more than just a project; it’s an opportunity to breathe new life into an old piece of equipment. Whether you plan to use your trailer for camping adventures, moving furniture, or as a mobile workshop, there’s something deeply satisfying about transforming an old trailer into something functional and visually appealing. Here are a few reasons why trailer restoration is a rewarding endeavor:
- Cost-Effective: Restoring an old trailer can be significantly cheaper than buying a new one.
- Customization: You have the freedom to customize your trailer according to your needs and style.
- Environmental Impact: By restoring instead of buying new, you contribute to reducing waste.
- Skill Development: You’ll acquire valuable skills in mechanics, woodworking, and design.
Assessing Your Trailer’s Condition
Before diving into the restoration process, it’s crucial to assess the current condition of your trailer. This step helps you understand the extent of the work needed and develop a realistic plan. Here’s how I approached the assessment:
- Inspect the Frame: Check for rust, cracks, or damage. The frame is the backbone of your trailer, so it must be sturdy.
- Examine the Wheels and Axles: Look for wear and tear, and ensure that the tires are in good condition.
- Check the Interior: If your trailer has an interior, inspect the walls, flooring, and any furniture.
- Evaluate the Electrical System: Test the lights and wiring. Electrical issues can be tricky, so it’s best to address them early.
- Look for Water Damage: Pay special attention to areas that may have been exposed to moisture, such as the roof and seams.
Creating a Restoration Plan
Once I completed my assessment, it was time to create a restoration plan. A well-structured plan can save you time and money in the long run. Here’s how to create yours:
- Set a Budget: Determine how much you’re willing to spend on the restoration.
- Prioritize Tasks: List the tasks in order of importance. Start with structural repairs, then move to aesthetics.
- Gather Materials: Make a list of supplies and tools you’ll need. Don’t forget to include safety gear!
- Set a Timeline: Establish a realistic timeline for the project, considering your available time and resources.
Essential Tools and Materials
Having the right tools and materials is vital for a successful restoration. Here’s a list of essentials I found helpful during my project:
- Tools:
- Wrenches and sockets
- Drills and drill bits
- Screwdrivers (various types)
- Measuring tape
- Angle grinder (for rust removal)
- Paint sprayer or brushes
- Safety goggles and gloves
- Materials:
- Rust inhibitor and primer
- Paint (preferably durable and weather-resistant)
- Replacement parts (tires, lights, etc.)
- Sealant for joints and seams
- Wood for flooring or interior repairs
Step-by-Step Restoration Process
Now that I had my plan and materials ready, it was time to roll up my sleeves and get to work. Here’s a step-by-step guide based on my experience:
1. Structural Repairs
The first and most critical step is to ensure the structural integrity of your trailer. Here’s what I did:
- Repair the Frame: I used an angle grinder to remove rust and then applied a rust inhibitor before repainting.
- Check the Axles: I replaced any worn bearings and greased them to ensure smooth operation.
- Replace Damaged Parts: Any broken or severely rusted parts were replaced with new ones to ensure safety.
2. Wheel and Tire Maintenance
Wheels and tires are crucial for towing safety. I made sure to:
- Inspect and Replace Tires: I checked tire tread and replaced any that were worn.
- Lubricate Bearings: I made sure to grease the wheel bearings to prevent overheating.
3. Interior Overhaul
If your trailer has an interior, this is where you can get creative. Here are some steps I followed:
- Remove Old Furnishings: I took out any old furniture and flooring materials.
- Replace Flooring: I opted for a durable, weather-resistant vinyl flooring that looked great and was easy to clean.
- Paint and Decorate: A fresh coat of paint on the walls and some decorative touches made a world of difference.
4. Electrical System Update
Updating the electrical system can be daunting, but it’s crucial for safety and functionality. Here’s what I did:
- Replace Old Wiring: I removed any frayed or cracked wiring and replaced it with new, weather-resistant wiring.
- Install New Lights: I upgraded to LED lights for better visibility and energy efficiency.
5. Exterior Refresh
The exterior of your trailer is the first thing people see, so make it count! I took the following steps:
- Remove Rust: I used an angle grinder to remove rust from the exterior.
- Paint: I applied a weather-resistant paint to protect against the elements.
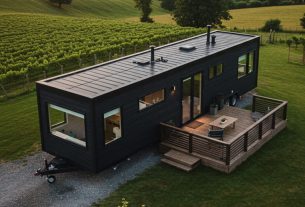
- Add Custom Touches: Decals, graphics, or a unique color scheme can make your trailer stand out.
Testing and Final Touches
After completing the restoration, it was time for testing. Here’s what I focused on:
- Inspect All Systems: I checked the braking system, lights, and tires to ensure everything was functional.
- Test Drive: A short test drive helped me identify any issues with towing.
- Final Cleaning: A thorough cleaning made my trailer look its best!
Sharing Your Progress
One of the most enjoyable aspects of restoring a trailer is sharing your progress with others. Join our community of restoration enthusiasts! Here’s how you can engage:
- Document Your Journey: Take photos and write about each phase of your project.
- Join Online Forums: Participate in forums where you can share tips and get advice.
- Social Media: Use platforms like Instagram and Facebook to showcase your work and inspire others.
Case Studies: Successful Trailer Restorations
To inspire you further, let me share a couple of case studies from fellow restoration enthusiasts:
Case Study 1: The Vintage Camping Trailer
A friend of mine restored a vintage camping trailer from the 1970s. After stripping it down to the frame, he rebuilt the interior, adding modern amenities while keeping the retro charm. He documented every step on social media, where he gained a following and even started a blog dedicated to vintage trailers!
Case Study 2: The Utility Trailer Transformation
Another acquaintance transformed an old utility trailer into a mobile garden. With a fresh coat of paint and some creative modifications, he turned it into a beautiful space to grow herbs and vegetables. He shared his project on a gardening forum, where it sparked interest among urban gardeners.
FAQ: Your Restoration Questions Answered
Q: How much does it cost to restore a trailer?
A: The cost can vary widely based on the condition of the trailer and the extent of repairs needed. On average, you might expect to spend anywhere from $500 to $5,000.
Q: Is it difficult to restore a trailer?
A: The difficulty level depends on your skills and the project’s complexity. However, many beginners successfully restore trailers with patience and research.
Q: Can I restore a trailer on my own?
A: Absolutely! Many people choose to restore trailers as DIY projects. Just make sure to seek guidance and advice when needed.
Conclusion: Your Journey Awaits
Restoring a trailer is a fulfilling project that not only enhances its functionality but also allows you to express your creativity. I hope my journey and insights inspire you to take on your own restoration project. Remember, every step you take is a step toward creating something uniquely yours. Don’t hesitate to join our community, share your progress, and learn from others. Let’s transform those haulers together!
If you found this article helpful, please consider signing up for our newsletter for more tips and inspiration. Share your restoration journey with friends and on social media—let’s spread the love for trailer restoration!
BIG RED T820014S Torin Hydraulic Trolley Service/Floor Jack with Blow Mold Carrying Storage Case, 1.5 Ton (3,000 lb) Capacity, Red
$37.70 (as of November 15, 2025 07:52 GMT -03:00 - More infoProduct prices and availability are accurate as of the date/time indicated and are subject to change. Any price and availability information displayed on [relevant Amazon Site(s), as applicable] at the time of purchase will apply to the purchase of this product.)
Sign up for our newsletter and stay up to date with exclusive news
that can transform your routine!