Have you ever looked at a trailer and thought, “I could build that”? If so, you’re not alone. Building a trailer at home can be a rewarding and practical project that allows you to unleash your DIY skills. Not only can you customize the trailer to fit your needs, but you also get the satisfaction of having created something with your own hands. In this article, I’ll guide you through the entire process of building a trailer, sharing my personal experiences, tips, and insights along the way. So grab your tools and let’s get started!
Why Build Your Own Trailer?
Building your own trailer comes with a plethora of benefits that can cater to your specific needs and preferences. Here are some of the reasons why I decided to take on this project:
- Customization: You can design the trailer to suit your unique needs, whether it’s for hauling equipment, camping, or moving furniture.
- Cost-Effectiveness: DIY trailers are often significantly cheaper than purchasing a pre-made one, especially if you source materials wisely.
- Quality Control: You have complete control over the materials and construction quality, which can lead to a more durable product.
- Skill Development: Building a trailer enhances your DIY skills and builds confidence in your ability to tackle future projects.
These benefits not only make the project worthwhile but also enhance the joy of ownership once the trailer is complete.
Essential Tools and Materials
Before diving into the construction, it’s important to gather all the necessary tools and materials. Here’s a comprehensive list of what you will need:
Tools
- Wrench set
- Screwdrivers (both flat and Phillips)
- Drill with drill bits
- Angle grinder
- Measuring tape
- Level
- Welding machine (if you’re welding parts together)
- Safety gear (gloves, goggles, etc.)
Materials
- Steel or aluminum frame materials
- Plywood for the flooring
- Axles and wheels
- Tongue (the part that connects to the vehicle)
- Lights and wiring (if applicable)
- Paint or sealant for weatherproofing
With these tools and materials in hand, you’re ready to start your trailer-building journey!
Step-by-Step Guide to Building Your Trailer
Now that we have our tools and materials sorted out, let’s dive into the step-by-step process of building a trailer. Remember, patience and precision are key!
Step 1: Design Your Trailer
The first step in building a trailer is designing it according to your needs. Here’s how I approached this:
- Determine the Purpose: Decide what you will primarily use the trailer for—hauling, camping, or something else.
- Sketch a Design: Create a rough sketch of your trailer layout, including dimensions and any special features.
- Research Regulations: Check local laws and regulations regarding trailer dimensions, weight limits, and safety requirements.
Taking the time to plan your trailer design will pay off greatly during construction.
Step 2: Build the Frame
The frame is the backbone of your trailer. Here’s how to build it:
- Cut the Materials: Using your measuring tape and angle grinder, cut your steel or aluminum frame materials according to your design.
- Assemble the Frame: Lay out the pieces on a flat surface and begin assembling the frame using bolts or welding as necessary.
- Check for Level: Use a level to ensure that the frame is squared and even before securing everything in place.
Take your time with this step, as a sturdy frame is crucial for the stability of your trailer.
Step 3: Install the Axles and Wheels
Next, it’s time to install the axles and wheels, which are essential for mobility:
- Position the Axles: Determine the proper placement of the axles based on your trailer design and load distribution.
- Secure the Axles: Use brackets or weld the axles to the frame. Make sure they are well-supported to handle the weight.
- Attach the Wheels: Install the wheels onto the axles, ensuring they are securely fastened.
This step is crucial for ensuring that the trailer can safely carry its intended load.
Step 4: Add the Flooring
The flooring provides a solid base for your trailer. Here’s how to install it:
- Cut the Plywood: Measure and cut the plywood according to the dimensions of the trailer frame.
- Secure the Flooring: Attach the plywood to the frame using screws or bolts, ensuring it is firmly in place.
- Weatherproofing: Consider applying a sealant or paint to protect the wood from the elements.
A sturdy floor will enhance the trailer’s durability and functionality.
Step 5: Construct the Tongue
The tongue is essential for connecting your trailer to your vehicle. Follow these steps:
- Cut the Tongue Material: Use a sturdy material (steel or aluminum) and cut it to the appropriate length.
- Attach the Tongue: Connect the tongue to the front of the frame, ensuring it is securely fastened.
- Add a Coupler: Install a coupler that matches your vehicle’s hitch for easy connection and disconnection.
The tongue must be strong enough to handle the weight of the trailer and load, so make sure it’s well-constructed.
Step 6: Install Lights and Wiring
If your trailer will be used on public roads, you’ll need lights:
- Choose the Right Lights: Select lights that meet local regulations, including brake lights and turn signals.
- Run the Wiring: Install the wiring according to the manufacturer’s instructions, ensuring all connections are secure.
- Test the Lights: Before hitting the road, test the lights to ensure they are functioning properly.
Proper lighting is vital for safety and compliance with traffic laws.
Step 7: Final Touches and Safety Checks
Before taking your trailer out for a spin, it’s essential to make final adjustments:
- Check Connections: Double-check all connections, bolts, and screws to ensure everything is secure.
- Inspect the Trailer: Conduct a thorough inspection for any sharp edges or loose parts.
- Test Drive: Take your trailer for a short test drive to ensure stability and handling.
These final touches will ensure your trailer is ready for use and safe on the road.
Real-Life Case Study: My Trailer Journey
To give you some context on how rewarding this project can be, let me share my personal journey of building a trailer. A few months ago, I needed a trailer for my weekend camping trips. After researching various options, I decided to take the plunge and build my own.
Initially, I was intimidated by the prospect, but I followed the steps outlined above. I spent weekends working on my trailer and was amazed at how quickly it came together. By the time I was finished, I had a customized trailer that perfectly met my needs, and I saved a considerable amount of money. Most importantly, I felt a sense of accomplishment that no store-bought trailer could provide.
Common Mistakes to Avoid
As with any DIY project, there are common pitfalls to watch out for. Here are some mistakes I made (and learned from) during my trailer build:
- Rushing the Design Phase: Not spending enough time on the design led to mistakes later on. Take your time planning!
- Overloading the Trailer: Ensure that your trailer is built to handle the intended load to prevent damage and ensure safety.
- Neglecting Safety Features: Always include necessary safety features, such as lights and strong connections.
Learning from these mistakes can help you avoid them during your own build.
Maintenance Tips for Your Trailer
Once you’ve built your trailer, it’s essential to keep it in good condition. Here are some maintenance tips I’ve found useful:
- Regular Inspections: Check the frame, wheels, and lights regularly for any signs of wear or damage.
- Keep It Clean: Regularly clean the trailer to prevent rust and deterioration, especially if exposed to the elements.
- Check the Tires: Ensure that tires are properly inflated and have sufficient tread for safe travel.
Maintaining your trailer will extend its lifespan and ensure it remains safe to use.
Frequently Asked Questions (FAQs)
Can I use a homemade trailer for commercial purposes?
In most cases, homemade trailers can be used for commercial purposes, but you should check local regulations to ensure compliance with safety and licensing requirements.
How much does it cost to build a trailer at home?
The cost can vary widely based on materials and design, but a basic trailer can typically be built for under $1,000, significantly less than purchasing a new one.
Do I need a special license to tow a homemade trailer?
Requirements vary by location. Check local laws to determine if you need a special license or registration for your homemade trailer.
Conclusion
Building a trailer at home is not just a practical project; it’s an opportunity to unleash your creativity and DIY skills. From the initial design to the final touches, each step is a chance to create something uniquely yours. By following this guide and learning from my experiences, you can successfully build a trailer that meets your needs and provides years of service.
If you found this article helpful or inspiring, please consider sharing it with your friends and on social media. Also, don’t forget to sign up for our newsletter for more DIY tips and projects. Happy building!
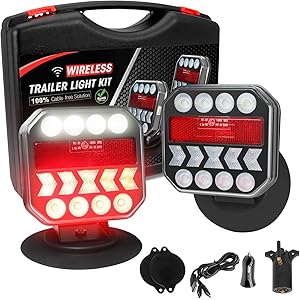
NeaLia Wireless Trailer Lights 110° Rotatable, Magnetic LED Trailer Light for Towing Truck RV, Rechargeable Tail Tow Lights Kit for Camper Boat Caravan Turn Signal Brake Reverse Stop, IP67 Waterproof
$69.99 (as of November 15, 2025 07:52 GMT -03:00 - More infoProduct prices and availability are accurate as of the date/time indicated and are subject to change. Any price and availability information displayed on [relevant Amazon Site(s), as applicable] at the time of purchase will apply to the purchase of this product.)
Sign up for our newsletter and stay up to date with exclusive news
that can transform your routine!