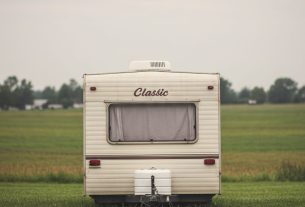
As someone who has always been enchanted by the great outdoors, I can confidently say that building a homemade trailer has been one of the most rewarding projects I’ve ever undertaken. Whether you’re an avid camper, a road trip enthusiast, or someone who simply loves to explore, having a custom trailer can elevate your adventures to new heights. In this article, I’ll share my journey, tips, and insights that will guide you in creating the ultimate DIY trailer. Let’s dive in!
Why Build Your Own Trailer?
The first question that may come to mind is: why should I build my own trailer? Here are a few compelling reasons:
- Customization: You can tailor your trailer to suit your specific needs and preferences.
- Cost-Effective: Building your own trailer can often be more affordable than purchasing one new.
- Satisfaction: There’s a unique satisfaction that comes from crafting something with your own hands.
- Quality Control: You can choose high-quality materials and finishes, ensuring longevity and durability.
Planning Your Trailer Build
Before diving into the construction process, it’s essential to have a well-thought-out plan. Here are the steps I took during the planning phase:
1. Define Your Needs
Consider what you’ll use the trailer for:
- Camping trips
- Transporting gear
- Living space
- Utility purposes
By identifying your needs, you can design a trailer that fits your lifestyle perfectly.
2. Research Local Regulations
Each state or country has its own regulations regarding trailer construction. I found it crucial to check:
- Weight limits
- Licensing requirements
- Safety standards
Adhering to these regulations ensures that you can legally and safely use your trailer on the road.
3. Create a Design Sketch
Drawing a sketch of your trailer can help visualize the end product. Here are some elements you might want to include:
- Dimensions
- Type of materials
- Layout (sleeping area, kitchen, storage)
Having a design sketch will serve as a roadmap throughout your building journey.
Gathering Materials and Tools
Once I had my plan in place, it was time to gather the necessary materials and tools. Here’s a list of what you might need:
Materials
- Steel or aluminum frame
- Wood for flooring and walls
- Insulation materials
- Exterior sheathing (like plywood or metal)
- Windows and doors
- Electrical wiring and fixtures (if needed)
- Paint or sealant
Tools
- Welding machine (if using metal)
- Power saw
- Drill and drill bits
- Measuring tape
- Level
- Screwdriver set
- Sandpaper or sander
Having the right tools and materials at your disposal will make the building process smoother and more efficient.
Step-by-Step Trailer Construction
Now that I had everything ready, it was time to get to work! Here’s a step-by-step guide based on my experience:
1. Build the Frame
The frame is the backbone of your trailer. I started by:
- Cutting the materials to the specified dimensions.
- Welding or bolting together the frame to ensure stability.
- Checking for levelness to avoid any future mishaps.
Make sure to reinforce joints and corners for added strength.
2. Add the Flooring
Next, I installed the flooring. It’s essential to use durable materials that can withstand wear and tear. Here’s how I did it:
- Cut the plywood to fit the frame.
- Secure it using screws, ensuring it’s flush with the edges.
- Consider sealing the wood to protect against moisture.
3. Construct the Walls
Building the walls can be one of the most exciting parts of the project. I followed these steps:
- Measure and cut wall panels according to your design.
- Attach the panels to the frame using screws.
- Add insulation for temperature regulation.
4. Install Windows and Doors
Adding windows and doors is not only functional but can also enhance the aesthetics of your trailer:
- Choose windows that fit snugly to prevent leaks.
- Follow manufacturer instructions for installation.
- Seal edges with weatherproofing materials.
5. External Sheathing and Roof
The exterior sheathing protects your trailer from the elements. I opted for:
- Plywood for a classic look or metal for durability.
- Ensure that the roofing is sloped to allow for water drainage.
- Seal all seams for waterproofing.
6. Electrical and Plumbing (Optional)
If your trailer will have electrical appliances or plumbing, this is the time to install those systems. Consider:
- Wiring for lights, outlets, and any appliances.
- Plumbing for sinks and showers if applicable.
- Consult a professional if you’re unsure about electrical work.
7. Interior Finishing Touches
Now comes the fun part—the interior! Here are a few ideas I implemented:
- Install cabinets and storage solutions.
- Include a foldable table for dining or working.
- Add comfortable bedding and decor to create a homey atmosphere.
Personalizing Your Trailer
Once the basics are complete, it’s time to make the trailer your own. Here are some personalization tips I found useful:
1. Color and Design
Your trailer’s exterior is its first impression. I chose a color scheme that reflects my personality. Consider:
- Using weather-resistant paint.
- Adding decals or graphics for flair.
- Choosing a color that blends with nature.
2. Functional Accessories
Think about accessories that enhance your trailer’s functionality:
- Awning for shade during hot days.
- Outdoor furniture for relaxing outside.
- Tool storage for easy access to gear.
3. Tech Upgrades
For tech enthusiasts, consider integrating:
- Solar panels for sustainable energy.
- Wi-Fi boosters for connectivity.
- Smart home features for convenience.
Safety and Maintenance Tips
Once your trailer is complete, safety and maintenance become paramount. Here are some tips I always keep in mind:
1. Regular Inspections
Check your trailer regularly for:
- Tire pressure and tread wear.
- Brake functionality.
- Structural integrity.
2. Proper Storage
When not in use, store your trailer in a covered area to:
- Protect it from harsh weather.
- Prevent rust and decay.
- Keep pests out.
3. Routine Cleaning
A clean trailer is a happy trailer! I recommend:
- Cleaning the exterior and interior frequently.
- Checking for mold or mildew.
- Ensuring all appliances are in good working order.
Case Study: A Successful DIY Trailer Adventure
To illustrate the joy of building a homemade trailer, let me share a case study of a fellow DIY enthusiast, Sarah. Sarah wanted a trailer to facilitate her weekend camping trips with her family. Here’s how she succeeded:
1. Setting a Budget
Sarah set a budget of $3,000, which she managed to stick to by sourcing materials from local hardware stores and using recycled materials wherever possible.
2. Community Support
She joined online forums and local DIY groups for support, where she exchanged ideas and gathered valuable insights.
3. Completing the Build
Within three months, she completed her trailer, including a small kitchenette, sleeping quarters, and a cozy seating area. The family enjoyed countless adventures, and Sarah even chronicled her journey in a blog, inspiring others to take on similar projects.
Conclusion
Building your own homemade trailer is not just a project; it’s an adventure that opens doors to new experiences and memories. Through careful planning, creativity, and dedication, you too can create a trailer that reflects your style and meets your needs. Whether you’re embarking on a weekend getaway or a cross-country road trip, your custom-built trailer will be the perfect companion. So gather your materials, get your tools, and start your DIY journey today!
FAQs
Q: How much does it cost to build a homemade trailer?
A: The cost can vary widely based on materials, design, and size, but many people complete builds for between $1,500 and $5,000.
Q: Do I need special permits to build a trailer?
A: It depends on your location. Check local regulations regarding trailer construction and use.
Q: Can I build a trailer without prior experience?
A: Absolutely! Many DIYers start with little to no experience. Online resources, tutorials, and community support can guide you through the process.
Q: What if I encounter problems during my build?
A: Don’t hesitate to seek help from friends, family, or online communities. Problem-solving is part of the DIY journey!
If you found this article helpful, please consider signing up for our newsletter for more tips and inspiration on DIY projects. Share this with friends and on social media to inspire others to embark on their homemade trailer journey!
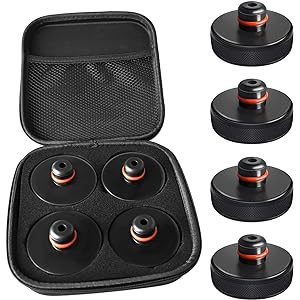
Chirano Lifting Jack Pad for Tesla Model 3/S/X/Y, 4 Pucks with Storage Case, Accessories for Tesla Vehicles 2013 to 2026
$20.99 (as of November 15, 2025 07:52 GMT -03:00 - More infoProduct prices and availability are accurate as of the date/time indicated and are subject to change. Any price and availability information displayed on [relevant Amazon Site(s), as applicable] at the time of purchase will apply to the purchase of this product.)
Sign up for our newsletter and stay up to date with exclusive news
that can transform your routine!