The Ultimate Bracelet Tutorial: How to Create Stunning Bracelets Step-by-Step
When it comes to creating your own jewelry, there’s nothing quite as satisfying as designing and crafting a bracelet with your own two hands. Whether you’re a seasoned crafter or a beginner looking to learn something new, creating custom bracelets is an incredibly rewarding and creative experience. The best part? You can design a bracelet that perfectly suits your personal style, making it an ideal accessory or a thoughtful gift for someone special.
In this ultimate bracelet tutorial, I’ll walk you through everything you need to know to create beautiful, unique bracelets that will turn heads. From choosing the right materials and tools to learning essential techniques, I’ll guide you every step of the way. By the end of this tutorial, you’ll be able to make bracelets that are not only stylish but also meaningful, whether you’re making them for yourself or as personalized gifts. So, if you’ve ever wondered how to craft your own bracelets, read on, and let’s get started!
Why You Should Learn How to Make Your Own Bracelets
Before diving into the “how,” let’s first explore why making your own bracelets can be such a rewarding experience. While buying pre-made jewelry is convenient, there’s something truly special about creating a piece of jewelry that reflects your style, story, and creativity.
1. Personalization
When you make your own bracelets, you have complete control over the design, colors, and materials. This means you can craft something that’s tailored to your unique preferences. Want a bracelet that matches your favorite color? Or perhaps a piece with a gemstone that represents a special memory? You can achieve all of this when you craft your own bracelets.
2. Creativity
Creating bracelets allows you to experiment with different styles, materials, and techniques. Whether you want a simple design or a statement piece, the creative possibilities are endless. You’ll have fun mixing and matching beads, charms, and threads to create something that feels personal and authentic.
3. Cost-Effective
While handmade bracelets might seem like they would cost more, creating them yourself can actually be more cost-effective than buying high-end designer jewelry. Materials like beads, threads, and clasps are often inexpensive, and once you have the necessary tools, you can make multiple bracelets without breaking the bank.
4. Perfect Gifts
Handmade bracelets make incredible gifts, especially when given with love and thoughtfulness. Whether for a birthday, a special occasion, or just because, giving someone a bracelet that you’ve made yourself shows them how much you care.
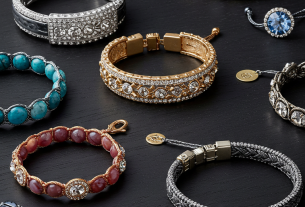
Essential Materials You’ll Need
Before we dive into the tutorial, let’s take a look at the materials you’ll need to get started. Don’t worry, these materials are easy to find, and you don’t need to spend a fortune on them.
1. Beads
Beads are the foundation of most bracelets. There are so many types of beads to choose from, including glass, wood, metal, gemstone, and plastic. You can select beads in various shapes and sizes depending on the design you have in mind. For example, larger beads work well for statement pieces, while smaller beads are perfect for delicate designs.
2. Stringing Material
To hold the beads together, you’ll need stringing material. Common options include elastic cord (perfect for stretch bracelets), nylon thread, and wire. The type of stringing material you choose depends on the look you want to achieve and the type of bracelet you’re making.
3. Clasps
If you’re making a bracelet that doesn’t stretch, you’ll need clasps to secure it. There are many types of clasps available, such as lobster clasps, toggle clasps, and magnetic clasps. Choose one that fits the overall style and function of your bracelet.
4. Beading Needles
Beading needles are thin, sharp needles that are designed specifically for stringing beads. These needles are especially helpful when working with small beads that need to be threaded onto your stringing material.
5. Scissors and Pliers
You’ll need scissors to cut the stringing material and pliers to attach the clasps and make adjustments. Pliers are especially useful for tightening knots and bending wires.
6. Charms and Pendants
Charms and pendants are optional but can add a personal touch to your bracelet. Consider adding a charm that holds sentimental value or represents something important to you.
Step-by-Step Bracelet Tutorial: How to Create a Simple Beaded Bracelet
Now that you’ve gathered all your materials, it’s time to start creating! In this section, I’ll guide you through the steps to create a simple beaded bracelet. This design is versatile, stylish, and a great starting point for beginners.
Materials:
- Beads (your choice of color and size)
- Elastic cord or nylon thread
- Scissors
- Needle (optional)
- Clasp (optional, if you’re not using elastic)
Instructions:
1. Measure Your Wrist
The first step in creating your bracelet is measuring your wrist. To do this, take a piece of string or measuring tape and wrap it around your wrist. Add about an extra inch to ensure that the bracelet will fit comfortably.
2. Cut the Stringing Material
Once you have your measurement, cut a piece of elastic cord (or thread) that’s about 6–8 inches longer than the measurement of your wrist. This extra length will allow for tying knots and attaching a clasp (if necessary).
3. Design Your Pattern
Before stringing your beads, decide on the pattern you want. You can opt for a uniform design (where each bead is the same size and color) or create a more random, eclectic pattern. Experiment with different color combinations and bead shapes to find a design that suits your style.
4. String the Beads
Now it’s time to start threading your beads onto the cord. If you’re using a needle, thread the needle onto the cord, then start stringing the beads one by one. Continue until you reach the desired length, ensuring that the beads fit comfortably around your wrist.
5. Tie the Knot
Once all the beads are strung, it’s time to secure the bracelet. If you’re using elastic cord, simply tie a strong knot to keep the beads in place. For extra security, tie a double knot. If you’re using thread, you can use a beading needle to tie a knot between the beads.
6. Attach the Clasp (Optional)
If you’re using thread and not elastic, you’ll need to attach a clasp. Cut a small piece of wire and use your pliers to attach the clasp to each end of the bracelet. If you’re using elastic, you can simply tie the ends together.
7. Finish and Trim
Once your knot is secure and the clasp is in place, trim any excess cord or thread with your scissors. Be sure to leave a little extra length near the knot to ensure it doesn’t unravel.
8. Wear and Enjoy
Congratulations! You’ve made your very own beaded bracelet. Try it on, and enjoy your beautiful, handcrafted piece of jewelry. You can experiment with different materials, colors, and designs to create a collection of bracelets that reflect your personal style.
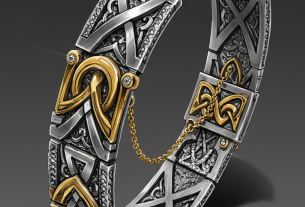
Advanced Bracelet Techniques to Try
Once you’ve mastered the basics, you can try more advanced techniques to elevate your bracelet-making skills. Here are a few ideas to inspire your next project:
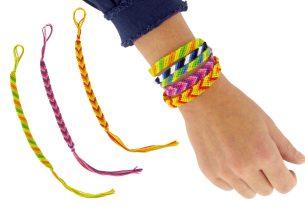
1. Macrame Bracelets
Macrame is a knotting technique that involves creating intricate patterns using cords. With macrame, you can create beautiful woven bracelets with different textures and designs.
2. Wire Wrapping
Wire wrapping is a technique that involves wrapping wire around beads, stones, or other components to create unique, sculptural designs. This technique allows you to create bracelets with an artisan feel.
3. Leather Bracelets
For a more rugged or masculine look, try making bracelets out of leather. You can add metal beads, clasps, and charms for extra flair.
4. Charm Bracelets
Create a personalized charm bracelet by adding meaningful charms that represent special memories or milestones in your life. These can be anything from tiny pendants to large, statement-making pieces.
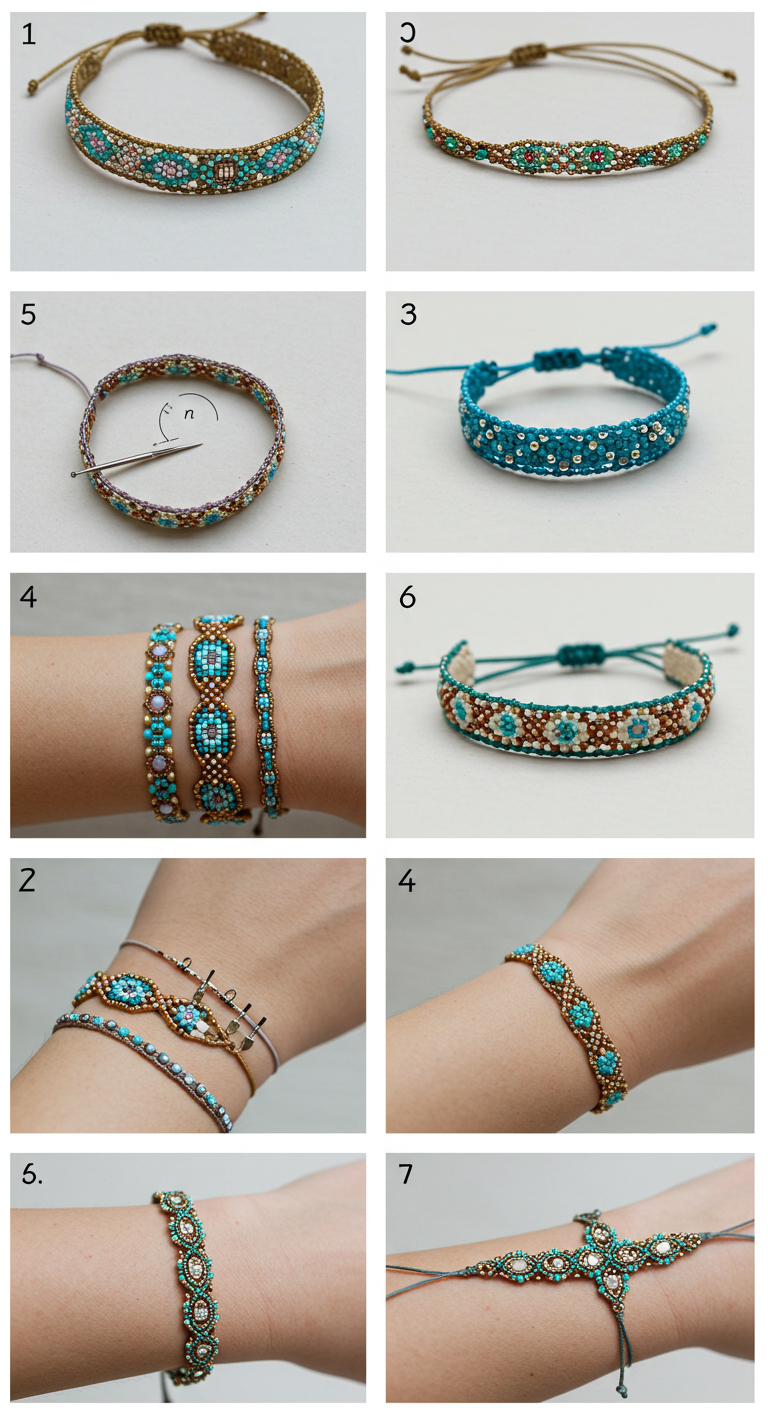
5. Beaded Cuffs
Beaded cuffs are wide bracelets that cover a larger area of your wrist. These bracelets can be made with a variety of beads and can feature intricate designs that wrap around the entire cuff.
Frequently Asked Questions (FAQ)
1. How do I know what size to make my bracelet?
Measure your wrist with a soft measuring tape and add an extra inch or two for comfort. If you’re using elastic cord, the bracelet should stretch to fit your wrist comfortably.
2. Can I use any type of stringing material?
While you can experiment with different materials, elastic cord is the most common choice for stretch bracelets, while nylon thread or wire is used for bracelets with clasps.
3. How can I make my bracelet more secure?
To ensure your bracelet doesn’t come undone, tie multiple knots and add a drop of jewelry glue for extra security. If you’re using a clasp, make sure it’s properly attached to both ends of the bracelet.
4. Can I make bracelets without beads?
Absolutely! You can make simple leather bracelets, woven friendship bracelets, or even use wire to create sculptural designs.
5. How long does it take to make a bracelet?
The time it takes to create a bracelet depends on the complexity of the design. A simple beaded bracelet might take around 30 minutes to an hour, while more intricate designs could take longer.
Now that you’ve learned the basics of bracelet making, it’s time to unleash your creativity and start crafting! Don’t forget, bracelet making is not only a fun and relaxing hobby but also a way to express yourself and create personalized gifts for others. Ready to stay updated with more DIY jewelry tutorials and fashion tips? Sign up for our newsletter and get fresh inspiration delivered straight to your inbox!
JoycuFF 𝗚𝗶𝗳𝘁𝘀 𝗳𝗼𝗿 𝗪𝗼𝗺𝗲𝗻 𝗠𝗼𝗼𝗻𝘀𝘁𝗼𝗻𝗲 𝗕𝗿𝗮𝗰𝗲𝗹𝗲𝘁 Amazonite Colorful Imperial Jasper Stainless Steel Beads Bracelets, Valentines Mothers Day Birthday Christmas Graduation Gifts
BRL 60.89 (as of February 6, 2026 16:40 GMT -03:00 - More infoProduct prices and availability are accurate as of the date/time indicated and are subject to change. Any price and availability information displayed on [relevant Amazon Site(s), as applicable] at the time of purchase will apply to the purchase of this product.)
4mm Thick Gold Chunky Earrings Steling Silver Post Hoops Earrings For Women Hollow Tube Hoops Earrings Thick Gold Hoop Earrings Hypoallergenic Lightweight Gold Hoop Large Earrings 20/30/40/50/60MM
BRL 62.56 (as of February 6, 2026 16:40 GMT -03:00 - More infoProduct prices and availability are accurate as of the date/time indicated and are subject to change. Any price and availability information displayed on [relevant Amazon Site(s), as applicable] at the time of purchase will apply to the purchase of this product.)
Receive tips, news and exclusive offers! Sign up for our newsletter now!