As I sat in my living room, surrounded by mismatched furniture and a color scheme that seemed to clash more than complement, I realized it was high time for a change. I wanted to create a space that not only reflected my personality but also felt inviting and harmonious. The idea of transforming my space through interior design from photos was exciting yet daunting. With the right tips and guidance, I knew I could achieve the aesthetic I had always dreamed of. In this article, I will share my journey, discoveries, and expert tips on how to transform your space using inspiration from photographs.
Understanding the Power of Visual Inspiration
When I first began exploring interior design, I was overwhelmed by the sheer volume of styles, trends, and ideas available. However, one thing became clear: visual inspiration is a powerful tool. Photographs serve as a bridge between imagination and reality, allowing us to visualize our ideal spaces. Here’s why visual inspiration is so effective:
- Clarity of Vision: Photos help clarify what styles resonate with us. They provide a concrete example of color palettes, furniture arrangements, and decor styles.
- Trend Awareness: By observing current trends through images, I learned what’s in vogue and what might work for my space.
- Emotional Connection: A well-chosen photograph can evoke feelings and nostalgia, leading me to choose elements that truly resonate with my personal story.
Whether you’re flipping through design magazines, browsing Pinterest, or scrolling through Instagram, collecting images that speak to you is the first step in the transformation process.
Gathering Your Inspiration: Where to Look
With a plethora of resources available, finding the right inspiration can be both exciting and overwhelming. Here are some of my favorite sources for gathering interior design inspiration:
- Online Platforms: Websites like Pinterest and Houzz allow users to create boards and save images, making it easier to visualize a cohesive design.
- Social Media: Instagram and design blogs are treasure troves of innovative ideas. Follow interior designers and influencers who align with your style.
- Magazines and Books: Traditional sources like interior design magazines offer curated collections of stunning spaces and can provide insights into timeless design principles.
- Showrooms and Stores: Visiting furniture showrooms allows you to see how various pieces work together in a physical space, sparking ideas for your own home.
As I combed through these sources, I began to notice common themes in the styles I gravitated toward. This was my first step in defining my design aesthetic.
Identifying Your Style
Once I had gathered a collection of photos, the next step was to analyze them and identify a consistent style. Here are some popular interior design styles and their characteristics:
- Minimalist: Characterized by simplicity and a monochromatic palette, minimalist designs focus on functionality without clutter.
- Bohemian: This eclectic style embraces rich colors, patterns, and an array of textures, often featuring vintage finds and travel-inspired decor.
- Modern Farmhouse: A blend of rustic charm and modern elegance, this style incorporates distressed wood, neutral colors, and cozy textiles.
- Scandinavian: Known for its clean lines and functionality, Scandinavian design emphasizes natural light, simple color schemes, and sustainable materials.
- Industrial: Featuring raw materials like brick and metal, industrial design often showcases open spaces and a minimalistic approach to decor.
By categorizing my collected images into these styles, I discovered that I was drawn to a blend of modern farmhouse and Scandinavian aesthetics. This realization helped me focus my design choices moving forward.
Creating a Mood Board
To bring my vision to life, I decided to create a mood board. This visual collage allowed me to consolidate my ideas and see how different elements interact with one another. Here’s how I constructed my mood board:
- Choose a Base: I started with a neutral color palette that formed the foundation of my design.
- Add Textures: I incorporated swatches of fabrics and materials to give a sense of the tactile experience I wanted in the space.
- Incorporate Furniture and Decor: I included images of furniture pieces that matched my identified style, ensuring they complemented one another.
- Include Inspirational Quotes or Images: These elements helped to communicate the overall vibe I was aiming for.
Creating a mood board was a pivotal moment in my design journey. It not only helped me visualize the end result but also served as a reference point throughout the transformation process.
Planning Your Space
With a clear vision and mood board in hand, I set out to plan the layout of my space. Here are the steps I took to ensure a functional and aesthetically pleasing arrangement:
- Measure Your Space: Accurate measurements of my room were crucial. I made sure to note the dimensions of walls, windows, and doorways.
- Consider Flow and Functionality: I assessed how I wanted to use the space and how people would move within it. This influenced the placement of furniture.
- Create a Floor Plan: Using online tools or graph paper, I sketched different layouts to experiment with furniture arrangements before making any purchases.
- Prioritize Focal Points: I identified areas that would draw the eye, like a fireplace or a stunning piece of art, and arranged furniture to enhance these features.
Through this planning phase, I learned that a thoughtful layout can drastically improve the overall feel of a space, making it both functional and inviting.
Choosing the Right Colors
Color can make or break a room, so I took my time deciding on a palette that would evoke the right emotions and harmonize with my chosen style. Here are some strategies I used:
- Start with Neutrals: I chose a base of neutral colors to create a calming backdrop. This allowed me to add pops of color through accessories and decor.
- Use the 60-30-10 Rule: This classic design principle suggests that 60% of the room should be a dominant color, 30% a secondary color, and 10% an accent color.
- Consider Lighting: I tested paint colors in different lighting conditions to see how they would appear throughout the day.
- Embrace Seasonal Changes: I thought about how colors might feel in different seasons and incorporated elements that could be easily changed with the seasons.
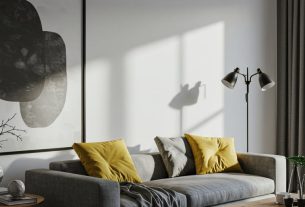
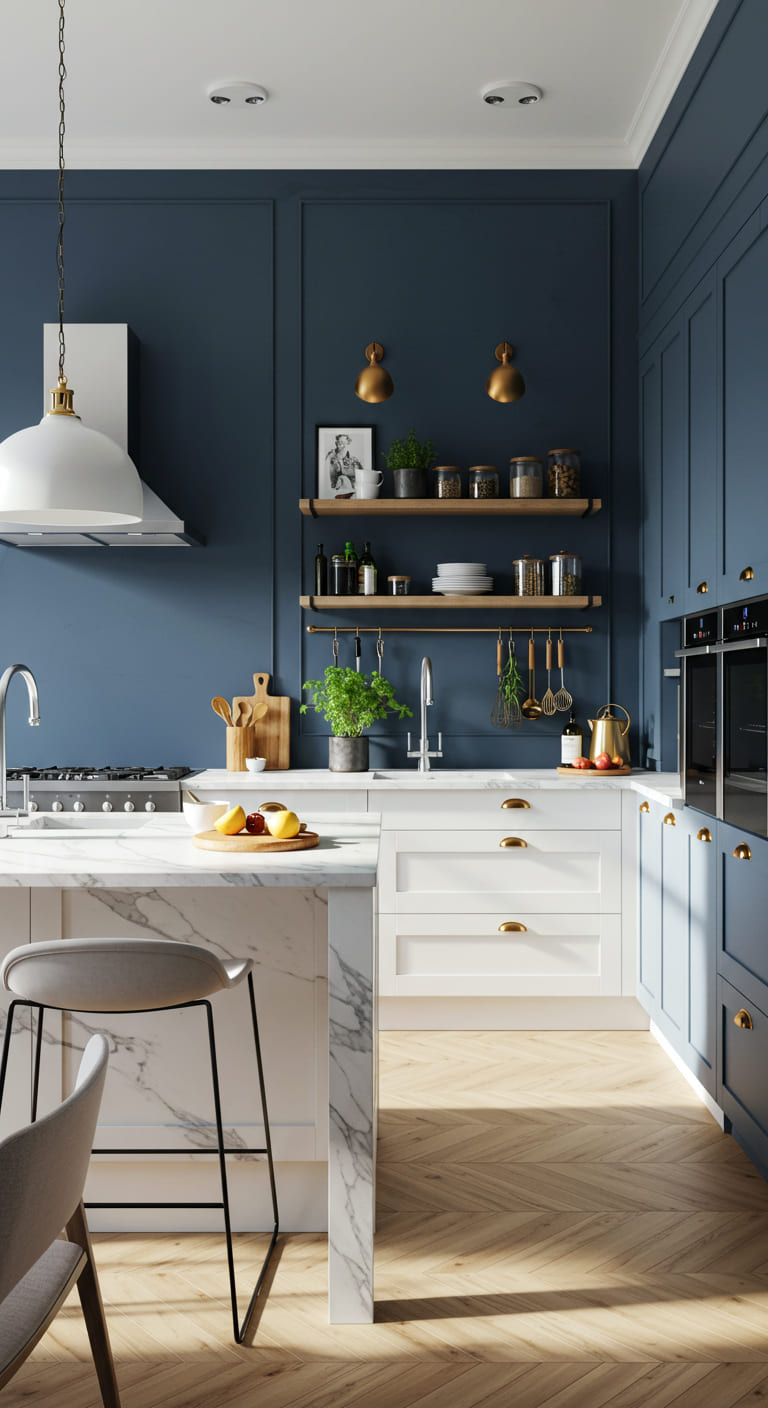
After experimenting with various swatches, I settled on a warm beige as my base, complemented by deep navy accents and soft white trim. This combination gave my space a cozy yet modern feel.
Selecting Furniture and Decor
With a color scheme in place, I turned my attention to selecting furniture and decor. This was one of the most exciting parts of the transformation! Here are some tips I found helpful:
- Invest in Key Pieces: I splurged on a few high-quality furniture items that would serve as focal points, such as a statement sofa and a unique coffee table.
- Mix and Match: I embraced a mix of new and vintage items, ensuring that my space had character and depth.
- Pay Attention to Scale: I made sure that the size of each piece harmonized with the space; larger rooms can handle bigger items, while smaller spaces need more delicate furnishings.
- Accessorize Thoughtfully: I chose decor items that reflected my personality, including artwork, plants, and decorative objects, to add warmth and interest.
As I brought these elements together, my space began to transform into something I had only dreamed of. Each piece I selected told a story and contributed to the overall vision I had created.
Incorporating Lighting
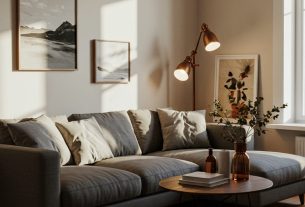
Lighting is another critical aspect of interior design that can dramatically alter the mood of a room. I learned to layer different types of lighting to create both functionality and ambiance:
- Ambient Lighting: I used overhead fixtures to provide general illumination throughout the room.
- Task Lighting: I added focused lighting, such as table lamps and reading lights, for specific activities.
- Accent Lighting: I incorporated decorative elements like wall sconces and LED strips to highlight artwork or architectural features.
By thoughtfully considering lighting, I was able to create a warm, inviting atmosphere that enhanced the overall design of my space.
Personalizing Your Space
One of the most rewarding aspects of my interior design journey was the opportunity to infuse my personality into the space. Here are some ways I made my home uniquely mine:
- Display Personal Art: I hung artwork that resonated with my experiences and interests, from travel photography to paintings by local artists.
- Incorporate Sentimental Items: I included family heirlooms and mementos that reminded me of cherished memories.
- Create a Gallery Wall: This became a focal point in my living room, showcasing a collection of framed photos and art pieces that told my story.
- Use Meaningful Colors: I chose colors that had personal significance, ensuring the space felt like an extension of myself.
By personalizing my space, I transformed it into a sanctuary that truly reflected who I am.
Final Touches: Styling Your Space
As I approached the final stages of my interior design project, I focused on styling and adding the finishing touches. This was where the magic truly happened:
- Layer Textures: I added throws, cushions, and rugs to create a cozy atmosphere and add visual interest.
- Arrange Decor Thoughtfully: I arranged decor items in groups of three or five to create a balanced and visually appealing display.
- Incorporate Plants: Bringing greenery into the space added life and freshness, enhancing the overall aesthetic.
- Adjust and Fine-Tune: I took my time to step back and evaluate the space, making small adjustments until everything felt just right.
These final touches made all the difference, transforming my space from a mere collection of furniture to a cohesive and inviting home.
Case Study: A Room Transformation
To illustrate the impact of interior design from photos, let me share a case study of a friend who undertook a similar journey. She had a small, dimly lit bedroom that felt cramped and uninspiring. After gathering inspiration from various sources, she decided to embrace a Scandinavian style. Here’s how she transformed her space:
- Color Palette: She painted her walls a soft white, which brightened the room and made it feel more spacious.
- Furniture Selection: She opted for a low-profile bed frame and minimalist nightstands to maximize floor space.
- Lighting: She added a statement pendant light and table lamps with warm bulbs to enhance the cozy atmosphere.
- Decor: She incorporated textiles with geometric patterns and added greenery with potted plants, creating a fresh and vibrant look.
The transformation was remarkable. Her once-dim room became a bright and airy sanctuary that perfectly matched her aesthetic. This case study serves as a testament to the power of visual inspiration and careful planning in achieving a successful interior design project.
Conclusion: Your Journey Awaits
Embarking on an interior design journey can be both thrilling and intimidating, but with the right tools and inspiration, you can transform your space into a reflection of your vision. From gathering visual inspiration to personalizing your home, every step is an opportunity to express your creativity and enhance your living environment.
As you begin your design journey, remember to:
- Gather inspiration from various sources.
- Identify your personal style and create a mood board.
- Plan your space thoughtfully, considering functionality and flow.
- Choose colors and furniture that resonate with you.
- Incorporate lighting and personal touches for warmth and character.
With these expert tips and a clear vision, you’re well on your way to creating a space that feels uniquely yours. Don’t be afraid to experiment and make adjustments along the way. Your home is a canvas, and you are the artist!
FAQ
Q: How do I start my interior design journey?
A: Begin by gathering inspiration from photos and identifying your personal style. Create a mood board and plan your space thoughtfully before making any purchases.
Q: What if I’m on a budget?
A: There are many ways to design beautifully on a budget. Consider thrift stores, DIY projects, and prioritizing key pieces to make a significant impact without overspending.
Q: How do I choose the right colors for my space?
A: Start with a neutral base and use the 60-30-10 rule for color distribution. Test paint colors in different lighting to see how they change throughout the day.
Q: Can I mix different styles?
A: Absolutely! Mixing styles can create a unique and personalized look. Just ensure that there is a common element, such as color or texture, to tie the design together.
I invite you to join me on this journey of transformation! Sign up for our newsletter for more expert tips, inspiration, and resources. Don’t forget to share this article with friends and on social media to help others discover the joy of interior design!

Positive Crochet Taco Birthday Gifts for Women Men Valentines Decor Easter Basket Stuffers Essentials Gift Kids Son Mom Dad Daughter Sister Friend Coworkers Self Care Emotional Inspirational Support
$9.98 (as of 01/02/2026 04:42 GMT -03:00 - More infoProduct prices and availability are accurate as of the date/time indicated and are subject to change. Any price and availability information displayed on [relevant Amazon Site(s), as applicable] at the time of purchase will apply to the purchase of this product.)
Sign up for our newsletter and stay up to date with exclusive news
that can transform your routine!