When I first ventured into the world of interior design, I was overwhelmed by the possibilities and the tools available at my fingertips. The ability to transform a space not just through color and furniture but through the very lines and sketches I created was exhilarating. Today, I’m excited to share my journey with you and invite you to join our free workshop where we’ll delve deep into the art of interior design drawing.
Why Interior Design Drawing Matters
Interior design drawing isn’t just about making pretty pictures; it’s a pivotal part of the design process. It helps to visualize concepts, communicate ideas, and propose solutions to clients. Here’s why honing your drawing skills is essential:
- Visualization: Drawing allows you to see your ideas come to life before any physical implementation.
- Communication: Sketches convey ideas more effectively than words alone; they are universal.
- Problem-solving: Through drawing, I’ve navigated design challenges and found creative solutions.
- Creativity: Engaging in drawing fosters creativity and encourages new ideas.
What You Will Learn in Our Free Workshop
Our workshop is designed to take you from novice to confident designer. Here’s a sneak peek into what you can expect:
- Basics of Interior Design Drawing: We’ll cover essential techniques and tools.
- Step-by-Step Drawing Techniques: Learn how to create floor plans, elevations, and perspectives.
- Color Theory and Textures: Understand how to incorporate colors and materials into your designs.
- Real-Life Case Studies: I’ll share examples from my own projects that illustrate the importance of drawing in the design process.
Step-by-Step Guide to Interior Design Drawing
Now, let’s dive into the step-by-step process of interior design drawing. Each step is crucial in transforming your ideas into tangible sketches.
Step 1: Gather Your Materials
Before you start, gather the necessary tools:
- Pencils (various grades for shading)
- Erasers (kneaded and regular)
- Ruler and scale
- Graph paper or drawing software
- Markers and colored pencils for final touches
Step 2: Start with a Concept
Every great design begins with a concept. Take some time to brainstorm and jot down ideas. Ask yourself:
- What is the purpose of the space?
- What atmosphere do I want to create?
- Who will be using the space, and what are their needs?
Step 3: Create a Floor Plan
A floor plan is the backbone of any interior design project. Here’s how to create one:
- Measure the dimensions of the space accurately.
- Use graph paper or a digital tool to scale your drawing.
- Start with the walls, noting doors and windows.
- Plan out furniture placement while considering flow and functionality.
Step 4: Elevations and Sections
Once your floor plan is complete, the next step is to create elevations and sections. This will help visualize the vertical aspects of your design:
- Elevations: Draw the front, side, and back views of the space.
- Sections: Create cut-through drawings to show the interior layout.
Step 5: Add Details
Details bring your drawings to life. Incorporate elements such as:
- Textures and materials
- Lighting fixtures
- Colors
- Accessories and furniture styles
Step 6: Finalize and Present Your Drawing
Once you have completed your drawings, it’s time to finalize them. Clean up any rough edges and add color where necessary. Consider how you will present your work:
- Digital presentations for clients
- Physical portfolio for interviews
- Social media for showcasing your skills
Real-Life Examples: How Drawing Transformed My Projects
Throughout my career, there have been several instances where drawing played a pivotal role in my design process. Here are a couple of case studies:
Case Study 1: A Small Apartment Redesign
When I was tasked with redesigning a small apartment, I started with a detailed floor plan. By sketching out various layouts, I was able to visualize the best use of space, which ultimately led to a more functional and aesthetically pleasing design. The sketches helped communicate my vision clearly to the client, and together we made adjustments that enhanced their living experience.
Case Study 2: A Commercial Space Transformation
For a commercial office redesign, my initial sketches focused on creating an open layout. By presenting my ideas through detailed elevations, I was able to illustrate how the new design would facilitate collaboration among employees. The result was a modern, inviting workspace that increased productivity and satisfaction.
Statistics: The Importance of Design Drawing in the Industry
To emphasize the significance of interior design drawing, consider these statistics:
- According to a recent survey, 85% of clients prefer visual representations of their designs over verbal descriptions.
- Projects that incorporate detailed drawings are completed 30% faster than those that do not.
- Designers who utilize sketches in their proposals see a 40% increase in client approval rates.
Frequently Asked Questions (FAQs)
1. Do I need to be an artist to excel in interior design drawing?
No, you don’t need to be a professional artist. The goal is to effectively communicate your ideas, which can be achieved through practice and learning basic techniques.
2. What software can I use for digital drawing?
Popular software options include AutoCAD, SketchUp, and Adobe Illustrator. Each has its unique features tailored for interior design.
3. How can I improve my drawing skills?
Practice regularly, take online courses, and participate in workshops to enhance your skills. Joining our free workshop is a great starting point!
Conclusion: Unlock Your Creativity Today!
Interior design drawing is a fundamental skill that can unlock your creative potential and elevate your designs. By mastering the steps outlined in this article and participating in our free workshop, you’ll gain the confidence and skills needed to transform your ideas into stunning visual representations. Don’t miss out on this opportunity to enhance your abilities and connect with like-minded individuals!
Sign up for our newsletter for more tips and inspiration, and share this article with friends and on social media. Let’s embark on this creative journey together!
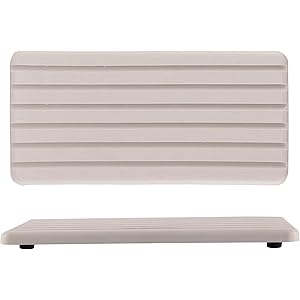
NiuYichee 2 PCS Water Absorbent diatomite Coasters, 8.3" x 4" Water Absorbing Stone Tray for Sink, Stone Drying mat for Kitchen Counter, Stone soap Tray Used for Hand Soaps & toiletries & Plants
$8.49 (as of 01/02/2026 04:42 GMT -03:00 - More infoProduct prices and availability are accurate as of the date/time indicated and are subject to change. Any price and availability information displayed on [relevant Amazon Site(s), as applicable] at the time of purchase will apply to the purchase of this product.)
Sign up for our newsletter and stay up to date with exclusive news
that can transform your routine!