Creating a garden path can be an exciting project, and I’m here to guide you through the process of making one on a budget. A well-constructed garden path not only enhances the aesthetics of your outdoor space but also provides functionality and ease of movement. Throughout this article, I will share practical tips, creative ideas, and insights drawn from my experiences and research, making your garden transformation both enjoyable and affordable.
Understanding the Importance of a Garden Path
Before we dive into the nitty-gritty of creating a garden path, let’s understand why it’s essential. A garden path can serve multiple purposes:
- Enhances accessibility between different areas of your garden
- Helps to manage foot traffic and minimize soil compaction
- Adds visual appeal and structure to your outdoor space
- Can be an expression of your personal style and creativity
Realizing these benefits motivates me even more to create paths that not only serve a purpose but also add character to my garden. Now, let’s explore how I can create a beautiful garden path without breaking the bank.
Planning Your Garden Path
Before embarking on any garden project, planning is crucial. Here’s how I approach the planning phase:
1. Define the Purpose and Location
First, I ask myself: Where do I want my garden path to lead? Whether it’s to connect different flower beds, lead to a seating area, or simply create a meandering walk through the greenery, defining the purpose will guide my design choices.
2. Measure and Design
Next, I measure the area where I want to install the path. I often sketch a simple layout on paper, outlining the path’s width, length, and overall shape. Here are some design considerations:
- Width: Should accommodate at least two people walking side by side
- Curvature: A winding path offers a more natural look
- Materials: Consider what materials will complement your garden style
3. Budgeting
Creating a budget is essential. I break down potential costs, including materials, tools, and any additional landscaping elements. This helps keep my spending in check and allows me to prioritize my expenses.
Choosing Affordable Materials
One of the most exciting aspects of creating a garden path is selecting the materials. Fortunately, there are plenty of budget-friendly options available. Here are a few that I find particularly useful:
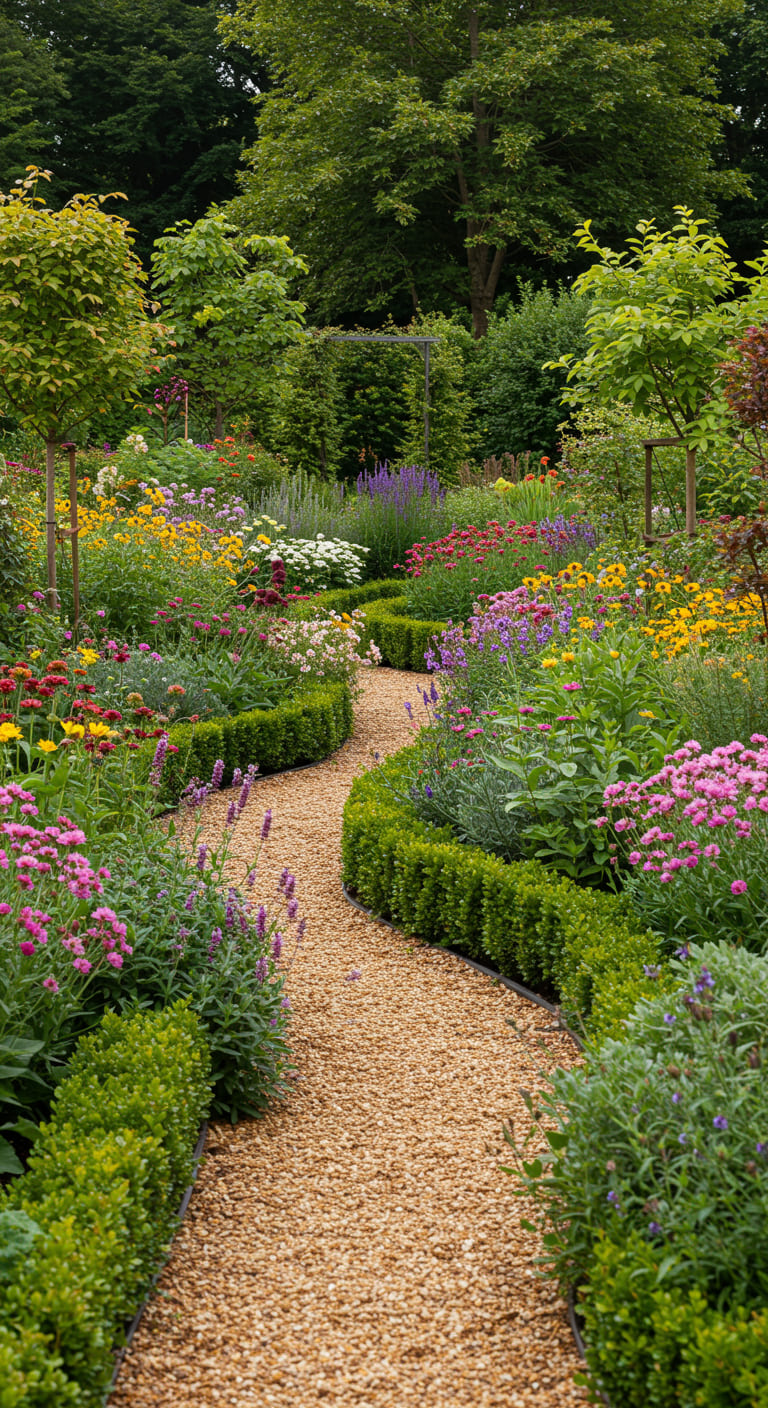
1. Gravel
Gravel is one of the most cost-effective materials for garden paths. It’s easy to work with, allows for good drainage, and can be found in various colors and sizes. Here’s how I use gravel:
- Prepare the area by removing grass and weeds.
- Lay down landscaping fabric to prevent weed growth.
- Add a layer of gravel, compacting it to create a stable surface.
2. Mulch
Mulch is not only inexpensive, but it also enriches the soil as it decomposes. I often use wood chips or bark mulch for a natural look. To create a mulch path:
- Clear the area and lay down landscape fabric.
- Add a thick layer of mulch for a soft walking surface.
3. Pavers
If I want something a bit sturdier, I consider using reclaimed pavers or bricks. These can often be found at a fraction of the cost if sourced from salvage yards or second-hand stores. Here’s how I lay pavers:
- Excavate the area to create a level base.
- Lay a layer of sand for drainage.
- Arrange the pavers in my desired pattern, ensuring they are level.
4. Stone and Concrete
Natural stone can be a beautiful addition to any path, and using broken pieces or leftover stones can keep costs low. If I prefer using concrete, I often create my own stepping stones using molds, allowing for customization at a lower price.
DIY Techniques to Build Your Path
With materials in hand, it’s time to get my hands dirty. Here are some DIY techniques I’ve found effective:
1. The “Stepping Stone” Method
This method involves creating individual stepping stones spaced apart. I use concrete mixes in molds for a custom shape. Here’s how I do it:
- Prepare the concrete mix according to the package instructions.
- Pour the concrete into molds and allow it to set.
- Once dry, arrange the stones along the desired path, filling gaps with gravel or grass.
2. The “Gravel and Timber” Approach
This combination of gravel and timber offers an attractive and rustic look. Here’s my process:
- Dig out a path and lay down landscape fabric.
- Add a layer of gravel and compact it.
- Place timber (e.g., treated wood or logs) along the edges to define the path.
3. The “Curved Path” Design
For a more whimsical look, I often opt for a curved path, which can be achieved with any material. Here’s what I do:
- Use a garden hose or rope to lay out the desired curve.
- Clear the path and set up edging materials (like stones or bricks).
- Fill with chosen material (gravel, mulch, etc.) for a finished look.
Incorporating Plants into Your Path
To further enhance the beauty of my garden path, I love incorporating plants. Here are some ideas:
- Low-growing ground covers like thyme or creeping phlox can soften the edges.
- Planting flowers along the sides adds color and fragrance.
- Using native plants can attract beneficial insects and support biodiversity.
Case Studies: Successful Budget-Friendly Garden Paths
To illustrate the impact of budget-friendly garden paths, I want to share a couple of inspiring case studies:
Case Study 1: The Community Garden
In a local community garden, volunteers transformed a neglected area into a vibrant space by using recycled bricks and gravel for paths. They reported:
- A 50% reduction in mud during rainy seasons.
- Increased foot traffic and participation in gardening activities.
Case Study 2: The Urban Backyard
A friend of mine created a stunning gravel path in her small urban backyard using only $100 worth of materials sourced from local hardware stores. She noted:
- Enhanced the overall aesthetic of her garden.
- Improved accessibility to her vegetable beds.
Tips for Maintenance
Once my garden path is established, maintenance is crucial to keep it looking great. Here are some tips I follow:
- Regularly remove weeds and debris to maintain cleanliness.
- Replenish gravel or mulch as needed to keep the surface even.
- Inspect edges for erosion and reinforce as necessary.
Conclusion: Your Path Awaits
Creating a garden path on a budget is not only possible but can also be a rewarding experience. From selecting affordable materials to employing DIY techniques, I hope this guide has empowered you to embark on your journey. Remember, every garden path is unique, reflecting personal style and creativity.
Now that you’re equipped with tips and ideas, I encourage you to share your own experiences and ideas in the comments below. Let’s inspire each other as we transform our outdoor spaces!
FAQ
1. What is the cheapest material for a garden path?
Gravel is often considered the cheapest and most versatile material for garden paths. It’s easy to install and maintain, providing good drainage.
2. Can I use recycled materials for my garden path?
Absolutely! Recycled bricks, stones, and even old concrete can be creatively used to build an attractive garden path.
3. How do I prevent weeds from growing in my garden path?
Using landscaping fabric under gravel or mulch can significantly reduce weed growth. Regular maintenance and quick removal of any weeds that do appear are also effective.
Don’t forget to sign up for our newsletter for more gardening tips and inspiration. Share this article with friends and on social media to spread the joy of gardening!
Barrina T5 Grow Lights for Indoor Plants, 5000K Full Spectrum, 1FT LED Growing Lamp, Plant Light Strip, for Seed Starting, Vegetables, Plug and Play, 4-Pack
$27.51 (as of 01/02/2026 04:53 GMT -03:00 - More infoProduct prices and availability are accurate as of the date/time indicated and are subject to change. Any price and availability information displayed on [relevant Amazon Site(s), as applicable] at the time of purchase will apply to the purchase of this product.)
Sign up for our newsletter and stay up to date with exclusive news
that can transform your routine!


