Welcome to my blog, where I’m excited to share my passion for gardening and outdoor transformation. If you’ve ever found yourself tangled in a web of hoses or frustrated with the constant battle against unruly garden hoses, you’re in the right place. Today, I’ll guide you through the process of creating your own DIY garden hose guides that will not only help organize your space but also enhance the aesthetics of your garden. Let’s dive into this creative journey!
Why Garden Hose Guides Matter
Before we jump into the how-to, let’s talk about why garden hose guides are essential for every gardener. A well-maintained garden hose can make all the difference in your outdoor experience. Here are some compelling reasons:
- Organization: Hose guides keep your hoses neatly in place, preventing tangles and kinks.
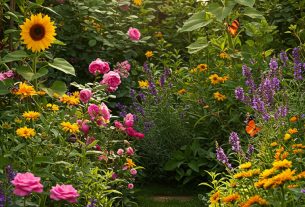
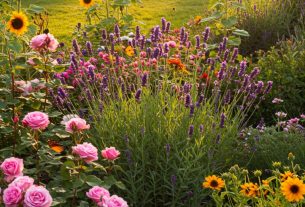
- Aesthetics: A tidy garden enhances the overall beauty of your outdoor space.
- Efficiency: Having your hose organized saves time and effort when watering your plants.
- Durability: Protecting your hoses from wear and tear extends their lifespan.
With these benefits in mind, let’s explore some expert tips and creative ideas for your DIY garden hose guides!
Materials You’ll Need
Before we get started, let’s gather the materials. Depending on your chosen design, you might need:
- Wooden stakes or dowels
- Plastic or metal hooks
- Rope or wire
- PVC pipes
- Paint or wood stain (for aesthetics)
- Drill and screws (if needed)
- Measuring tape
- Paintbrush
With your materials ready, you can choose from various designs. Let’s explore a few creative options!
Creative DIY Garden Hose Guide Ideas
1. Classic Wooden Stake Guides
One of the simplest and most effective designs is the classic wooden stake guide. Here’s how to create them:
- Choose the Stakes: Select wooden stakes that are at least 3-4 feet long.
- Positioning: Hammer the stakes into the ground at regular intervals along your garden path.
- Attach Hooks: Install hooks on each stake to hold the hose in place.
- Finish with Stain: If you want, paint or stain the stakes to match your garden aesthetic.
This design is not only functional but also adds a rustic charm to your garden.
2. PVC Pipe Hose Guides
If you’re more inclined towards a modern look, consider using PVC pipes. Here’s how you can create PVC hose guides:
- Cut the Pipes: Cut the PVC pipes into sections of your desired height.
- Drill Holes: Drill holes at the top for a decorative touch.
- Assemble: Insert the pipes into the ground at strategic points where you want to guide your hose.
- Paint the Pipes: Use spray paint to match your garden theme.
PVC pipe guides are durable and can easily blend into any landscape.
3. Decorative Hose Holders
If you want to combine functionality and style, decorative hose holders are a fantastic option. Here’s how you can make one:
- Find a Container: Look for an attractive container, such as an old bucket or a ceramic pot.
- Add Drainage: If using a container, make sure it has drainage holes.
- Fill with Gravel: Fill the bottom with gravel for stability.
- Coil the Hose: Neatly coil your hose inside the container.
This approach not only organizes your hose but also adds a unique decorative element to your garden.
Step-by-Step Guide to Building Your Own Hose Guide
Now that I’ve shared some creative ideas, it’s time to get into the nitty-gritty of building your own hose guide. Here’s a comprehensive step-by-step guide:
- Plan Your Layout: Decide where you want to place your hose guides. Measure the space to determine how many guides you need.
- Choose Your Design: Pick one of the designs mentioned above that best suits your style and needs.
- Gather Materials: Collect all necessary materials based on your chosen design.
- Prepare the Area: Clear the area of any debris or plants that may hinder the installation.
- Install the Guides: Follow the specific steps for your chosen design to install the guides securely.
- Test for Functionality: Once everything is in place, test the guides by coiling your hose around them to ensure they work properly.
Tips for Maintaining Your Garden Hose Guides
Now that you have your guides set up, maintaining them is key to ensuring they last. Here are some tips:
- Regular Inspections: Check for any wear and tear, especially if you used wooden materials.
- Cleanliness: Keep the area around the guides clear of soil and debris.
- Adjust as Needed: If your garden layout changes, don’t hesitate to adjust the positioning of your guides.
Case Studies: Success Stories from Fellow Gardeners
To inspire you further, let me share a couple of success stories from fellow gardeners who embraced DIY hose guides.
Case Study 1: The Urban Gardener
Emily, a passionate urban gardener, struggled with a tangled hose in her small patio garden. After implementing wooden stake guides, she reported a significant decrease in frustration and an increase in her gardening enjoyment. She even painted her stakes bright colors to add a vibrant touch to her space.
Case Study 2: The Family Garden
The Johnson family transformed their backyard by creating decorative hose holders using old buckets. Not only did this keep their hoses organized, but it also became a fun family project. Their children loved painting the buckets, making it a memorable experience for everyone.
Statistics That Highlight the Importance of Garden Organization
To further emphasize the importance of garden hose guides, consider the following statistics:
- According to a 2020 survey by the National Gardening Association, 80% of gardeners reported that organization improved their gardening experience.
- Studies show that disorganized outdoor spaces can lead to decreased motivation and enjoyment in gardening.
- Proper hose management can extend the lifespan of hoses by up to 50%, saving you money in the long run.
FAQs About Garden Hose Guides
Q1: How do I determine the best location for my hose guides?
A1: Consider where you usually use your hose most frequently and place guides along the path you typically take while watering your plants.
Q2: Can I customize the design of my hose guides?
A2: Absolutely! Feel free to paint, decorate, or adjust the height and style of your guides to match your garden’s aesthetic.
Q3: How do I clean my hose guides?
A3: Simply use a damp cloth to wipe down any dirt or debris. For wooden guides, consider using a wood cleaner to maintain their appearance.
Conclusion: Transform Your Outdoor Space Today!
Creating your own garden hose guides is a rewarding project that not only enhances the organization of your outdoor space but also adds a personal touch to your garden. With the expert tips, creative ideas, and success stories shared in this article, I hope you feel inspired to embark on this DIY journey. Remember, a well-organized garden can transform your experience, making it more enjoyable and efficient.
If you found this article helpful, please consider signing up for our newsletter for more gardening tips and DIY projects. Share this article with your friends and on social media to spread the joy of gardening!
Happy gardening, and may your outdoor space flourish!
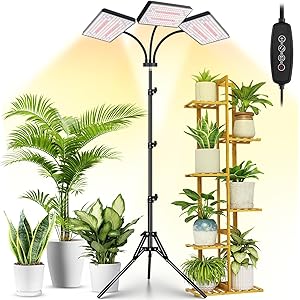
2024 LBW Grow Lights for Indoor Plants with Stand, 642 LEDs Full Spectrum Standing Plant Light, Tall Floor Plant Lamp with 3/6/12H Timer, 6 Brightness, 3 Modes, 63 " Adjustable Tripod
$50.99 (as of 08/12/2025 04:02 GMT -03:00 - More infoProduct prices and availability are accurate as of the date/time indicated and are subject to change. Any price and availability information displayed on [relevant Amazon Site(s), as applicable] at the time of purchase will apply to the purchase of this product.)
Sign up for our newsletter and stay up to date with exclusive news
that can transform your routine!